This article combines the methods for fixing the WSUS agent that I know of.
1. The first script is the simplest, and, in fact, it’s not even used for treatment, but in order to force the update scan to be started, well, at the same time, it cleans the folder where the distributions of already installed updates are accumulated:
wsus_detect_manual.cmd
net stop wuauserv && net stop bits && net stop cryptsvc
net start wuauserv && net start bits && net start cryptsvc
wuauclt.exe / detectnow exit
2. The second script is needed in order to “revive” the idle WSUS service. It cleans up old updates, after which the SoftwareDistribution and Catroot2 folders are renamed, which will restart when the service is restarted. Then the system dll libraries are re-registered.
fix_wsus_service.cmd
net stop bits
net stop wuauserv
net stop cryptsvc
del / f / s / q% windir% \\ SoftwareDistribution \\ download \\ *. *
ren% systemroot% \\ System32 \\ Catroot2 Catroot2.old
ren% systemroot% \\ SoftwareDistribution SoftwareDistribution.old
REM del / f / s / q% windir% \\ SoftwareDistribution \\ *. *
del / f / s / q% windir% \\ windowsupdate.log
% windir% \\ system32 \\ regsvr32.exe / U / s% windir% \\ system32 \\ vbscript.dll
% windir% \\ system32 \\ regsvr32.exe / U / s% windir% \\ system32 \\ mshtml.dll
% windir% \\ system32 \\ regsvr32.exe / U / s% windir% \\ system32 \\ msjava.dll
% windir% \\ system32 \\ regsvr32.exe / U / s% windir% \\ system32 \\ msxml.dll
% windir% \\ system32 \\ regsvr32.exe / U / s% windir% \\ system32 \\ actxprxy.dll
% windir% \\ system32 \\ regsvr32.exe / U / s% windir% \\ system32 \\ shdocvw.dll
% windir% \\ system32 \\ regsvr32.exe / U / s% windir% \\ system32 \\ wintrust.dll
% windir% \\ system32 \\ regsvr32.exe / U / s% windir% \\ system32 \\ initpki.dll
% windir% \\ system32 \\ regsvr32.exe / U / s% windir% \\ system32 \\ dssenh.dll
% windir% \\ system32 \\ regsvr32.exe / U / s% windir% \\ system32 \\ rsaenh.dll
% windir% \\ system32 \\ regsvr32.exe / U / s% windir% \\ system32 \\ gpkcsp.dll
% windir% \\ system32 \\ regsvr32.exe / U / s% windir% \\ system32 \\ sccbase.dll
% windir% \\ system32 \\ regsvr32.exe / U / s% windir% \\ system32 \\ slbcsp.dll
% windir% \\ system32 \\ regsvr32.exe / U / s% windir% \\ system32 \\ cryptdlg.dll
% windir% \\ system32 \\ regsvr32.exe / U / s% windir% \\ system32 \\ Urlmon.dll
% windir% \\ system32 \\ regsvr32.exe / U / s% windir% \\ system32 \\ Oleaut32.dll
% windir% \\ system32 \\ regsvr32.exe / U / s% windir% \\ system32 \\ msxml2.dll
% windir% \\ system32 \\ regsvr32.exe / U / s% windir% \\ system32 \\ Browseui.dll
% windir% \\ system32 \\ regsvr32.exe / U / s% windir% \\ system32 \\ shell32.dll
% windir% \\ system32 \\ regsvr32.exe / U / s% windir% \\ system32 \\ Mssip32.dll
% windir% \\ system32 \\ regsvr32.exe / U / s% windir% \\ system32 \\ atl.dll
% windir% \\ system32 \\ regsvr32.exe / U / s% windir% \\ system32 \\ jscript.dll
% windir% \\ system32 \\ regsvr32.exe / U / s% windir% \\ system32 \\ msxml3.dll
% windir% \\ system32 \\ regsvr32.exe / U / s% windir% \\ system32 \\ softpub.dll
% windir% \\ system32 \\ regsvr32.exe / U / s% windir% \\ system32 \\ wuapi.dll
% windir% \\ system32 \\ regsvr32.exe / U / s% windir% \\ system32 \\ wuaueng.dll
% windir% \\ system32 \\ regsvr32.exe / U / s% windir% \\ system32 \\ wuaueng1.dll
% windir% \\ system32 \\ regsvr32.exe / U / s% windir% \\ system32 \\ wucltui.dll
% windir% \\ system32 \\ regsvr32.exe / U / s% windir% \\ system32 \\ wups.dll
% windir% \\ system32 \\ regsvr32.exe / U / s% windir% \\ system32 \\ wups2.dll
% windir% \\ system32 \\ regsvr32.exe / U / s% windir% \\ system32 \\ wuweb.dll
% windir% \\ system32 \\ regsvr32.exe / s% windir% \\ system32 \\ vbscript.dll
% windir% \\ system32 \\ regsvr32.exe / s% windir% \\ system32 \\ mshtml.dll
% windir% \\ system32 \\ regsvr32.exe / s% windir% \\ system32 \\ msjava.dll
% windir% \\ system32 \\ regsvr32.exe / s% windir% \\ system32 \\ msxml.dll
% windir% \\ system32 \\ regsvr32.exe / s% windir% \\ system32 \\ actxprxy.dll
% windir% \\ system32 \\ regsvr32.exe / s% windir% \\ system32 \\ shdocvw.dll
% windir% \\ system32 \\ regsvr32.exe / s% windir% \\ system32 \\ wintrust.dll
% windir% \\ system32 \\ regsvr32.exe / s% windir% \\ system32 \\ initpki.dll
% windir% \\ system32 \\ regsvr32.exe / s% windir% \\ system32 \\ dssenh.dll
% windir% \\ system32 \\ regsvr32.exe / s% windir% \\ system32 \\ rsaenh.dll
% windir% \\ system32 \\ regsvr32.exe / s% windir% \\ system32 \\ gpkcsp.dll
% windir% \\ system32 \\ regsvr32.exe / s% windir% \\ system32 \\ sccbase.dll
% windir% \\ system32 \\ regsvr32.exe / s% windir% \\ system32 \\ slbcsp.dll
% windir% \\ system32 \\ regsvr32.exe / s% windir% \\ system32 \\ cryptdlg.dll
% windir% \\ system32 \\ regsvr32.exe / s% windir% \\ system32 \\ Urlmon.dll
% windir% \\ system32 \\ regsvr32.exe / s% windir% \\ system32 \\ Oleaut32.dll
% windir% \\ system32 \\ regsvr32.exe / s% windir% \\ system32 \\ msxml2.dll
% windir% \\ system32 \\ regsvr32.exe / s% windir% \\ system32 \\ Browseui.dll
% windir% \\ system32 \\ regsvr32.exe / s% windir% \\ system32 \\ shell32.dll
% windir% \\ system32 \\ regsvr32.exe / s% windir% \\ system32 \\ Mssip32.dll
% windir% \\ system32 \\ regsvr32.exe / s% windir% \\ system32 \\ atl.dll
% windir% \\ system32 \\ regsvr32.exe / s% windir% \\ system32 \\ jscript.dll
% windir% \\ system32 \\ regsvr32.exe / s% windir% \\ system32 \\ msxml3.dll
% windir% \\ system32 \\ regsvr32.exe / s% windir% \\ system32 \\ softpub.dll
% windir% \\ system32 \\ regsvr32.exe / s% windir% \\ system32 \\ wuapi.dll
% windir% \\ system32 \\ regsvr32.exe / s% windir% \\ system32 \\ wuaueng.dll
% windir% \\ system32 \\ regsvr32.exe / s% windir% \\ system32 \\ wuaueng1.dll
% windir% \\ system32 \\ regsvr32.exe / s% windir% \\ system32 \\ wucltui.dll
% windir% \\ system32 \\ regsvr32.exe / s% windir% \\ system32 \\ wups.dll
% windir% \\ system32 \\ regsvr32.exe / s% windir% \\ system32 \\ wups2.dll
% windir% \\ system32 \\ regsvr32.exe / s% windir% \\ system32 \\ wuweb.dll
net start bits
net start wuauserv
net start cryptsvc
wuauclt / detectnow
exit
3. This script is used in cases where the computer was recently cloned, or in those cases when the computer did not register with WSUS. It differs from the previous one only in the penultimate line, in which the authorization is reset with the regeneration of the identifier. I will give only this line:
wsus_resetaut_detect_manual.cmd
wuauclt.exe / resetauthorization / detectnow
AU_Clean_SID.cmd
@echo on
net stop wuauserv
REG DELETE "HKLM \\ SOFTWARE \\ Microsoft \\ Windows \\ CurrentVersion \\ WindowsUpdate" / v AccountDomainSid / f
REG DELETE "HKLM \\ SOFTWARE \\ Microsoft \\ Windows \\ CurrentVersion \\ WindowsUpdate" / v PingID / f
REG DELETE "HKLM \\ SOFTWARE \\ Microsoft \\ Windows \\ CurrentVersion \\ WindowsUpdate" / v SusClientId / f
net start wuauserv
wuauclt / resetauthorization / detectnow
5. Sometimes, in order for everything to work, you need to reinstall the WSUS agent. First you need to download the latest Windows Update Agent, and then install the appropriate edition
for x32 versions of Windows
windowsupdateagent30-x86.exe / wuforce
for x64 versions of Windows
windowsupdateagent30-x64.exe / wuforce
If you are a lucky owner of Itanium - guess for yourself :-)
After installing the agent, you must be sure to reboot.
6. For the “treatment” of errors 0x80070005, ie access errors may come in handy the script below. It restores access for administrators and the system to the registry and system folders.
To run this script, you will need the Microsoft utility subinacl.exe. It is included in the resource kit for Windows Server 2003, but you should not use the version that is included there, because there are unpleasant mistakes. You should download subinacl.exe version 5.2.3790.1180.
Restore_registry_and_system_permission.cmd
@echo off
REM Apply with error 0x80070005 Windows Update
subinacl / subkeyreg HKEY_LOCAL_MACHINE / grant \u003d administrators \u003d f
subinacl / subkeyreg HKEY_CURRENT_USER / grant \u003d administrators \u003d f
subinacl / subkeyreg HKEY_CLASSES_ROOT / grant \u003d administrators \u003d f
subinacl / subdirectories% SystemDrive% / grant \u003d administrators \u003d f
subinacl / subkeyreg HKEY_LOCAL_MACHINE / grant \u003d system \u003d f
subinacl / subkeyreg HKEY_CURRENT_USER / grant \u003d system \u003d f
subinacl / subkeyreg HKEY_CLASSES_ROOT / grant \u003d system \u003d f
subinacl / subdirectories% SystemDrive% / grant \u003d system \u003d f
All these scripts can be executed almost automatically in case of problems. If, as a result, the problem is still not solved, then you have to understand it more tightly. And here we need the same windowsupdate.log, which lies in the root of the Windows folder. If the computer is problematic, then this file is large. For simplicity, it is advisable to remove it before running scripts. Almost all scripts have a command to delete it, but not so simple. Despite the wuauserv service stopping, usually, open IEs, etc. continue to keep it. Therefore, there is a tricky way. I run
notepad.exe% windir% \\ windowsupdate.log
I select all the text, delete it and save it instead of the old file (do not forget to change the file type to *. * In the save dialog, otherwise it will be * .txt by default)
It is worth noting that there are cases when it is not possible to force the client to update with wsus. I have precedents with a couple of Windows Server 2003 R2 that I have not been able to overcome. Therefore, I update them via the Internet :-)
Fresh operating systems such as Windows 7, Windows 2008 sometimes “start up” with difficulty. For such cases, empirically, an algorithm of the type was found:
1. Updated for the first time from the microsoft site with an agent update
2. Then we update the agent locally
3. And then everything starts to work
I hope that the fruits of our labors will help someone.
For simplicity, I post all these scripts in a ready-made form:
Automatic updating is an important functional feature of any operating system. Thanks to her, the computer receives important updates on time, making the system more stable and secure. In Windows 7, the function is activated initially. This means that if there is a connection with Microsoft servers, the update service checks for fresh packages, downloads them and installs. Usually, all processes proceed almost imperceptibly for the user, but when constant offers appear to upgrade to 10, this is already too much.
Theoretically, disabling automatic download of updates is not worth it. It is useful because it closes security gaps, optimizes the OS, adds new features to it (with regards to the "dozens"). There is also a list of reasons why the auto-update service should be disabled:
- The user does not like that during the update the Internet speed drops and / or the PC cannot be turned off for a long time.
- On the computer, expensive or limited wireless Internet.
- Problems after starting the updated OS.
- Failures during the installation of service packs.
- There is not enough space on the system volume to increase the volume of Windows 7 growing with each update.
Kinds
Nevertheless, before you turn off the Windows 7 update, think about whether it is really necessary. In addition to deactivating the service, it can be transferred to the following modes of operation.
- Fully automatic - operations proceed without user intervention, only notifying the latter of the completion of package installation.
- Search and download the latest fixes on schedule, and the installation of packages is carried out by the user.
- Automatic check with notification of the user about the availability of updates.
- Self-update is turned off. Everything is done in manual mode.
Parameters are selected in the Update Center component.
Disabling Methods
The settings of any Windows are stored in its registry. You can access the key responsible for setting the update center in several simple and a couple of more complex ways. Consider them all.
Change Update Center settings
Let's start by customizing the work of the service for ourselves. To access the configuration interface, you need to open the "Update Center" in one of the following ways.
System
- Through the context menu of My computer, call its "Properties".
- In the left vertical menu, click on the appropriate link located at the bottom of the window.
- We go to the "Control Panel".
- We open the section "System, Security".
- We call the element of the same name.
If the elements of the control panel are visualized in the form of icons, not categories, a link to the element will already be displayed in the main window.
- So, after getting into the right window, click "Settings".
- We move to the “Important Updates” section and select the appropriate option from the drop-down list.
Completely turn off receiving updates on a computer with Windows 7 will only help stop the service.
Disable the service
Service management in the "seven" occurs through:
- direct editing of registry keys, which is very inconvenient;
- third-party programs to configure the OS (skip this option);
- mMC snap-ins
- system configuration
- command line
- group Policy Editor (present in Windows 7 Ultimate, Enterprise).
Removing a service from autorun
Disabling updates is most quickly done through the system configurator.
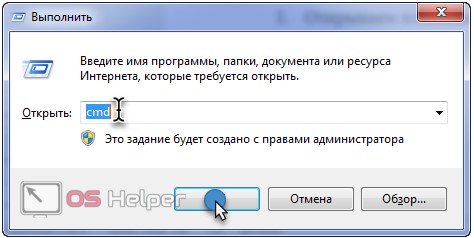
- We execute "msconfig" in the shell window that will open after pressing the Win + R keys or clicking on the "Run" button in the launch.
- Go to the Services tab.
- Find "Windows Update" (maybe Windows Update) and remove the checkbox next to it.
- Save the new settings.
Until the end of the current session, the service will work, regularly performing the tasks assigned to it. To apply the new configuration, Windows 7 must be rebooted.
Using the MMC snap-in
The snap-in of the system console of the same name provides access to manage all services on a PC. It starts like this.
- We open the context menu of the My Computer directory.
- We call the command "Management".
- In the left vertical menu, expand the “Services and Applications” item. Next, click on the link “Services”.
A simpler option to invoke the same window is to run the “services.msc” command through the “Run” dialog.
- Scroll the list of services to the very end and open the "Properties" of the Windows Update service.
- In the "Startup Type" drop-down list, select "Disabled" instead of "Automatic" in order to say goodbye to automatic updating forever. If you need to disable the service now, be sure to click "Stop". Save the new parameters with the “Apply” button and close all windows.
To apply the settings, the PC does not need a reboot.
Group Policy Editor
Another MMC snap-in called the Group Local Policy Editor will help you configure any system parameter.
In the home edition of the "seven" it is not available!
- The tool starts by launching the gpedit.msc command through the Run window.
- In the “PC Configuration” section, expand the “Administrative Templates” branch.
- Open "Windows Components" and look for the update center.
- In the right part of the window we find the parameter, the name of which begins with "Auto-update settings".
- We call its settings.
- Move the checkbox to the "Disable" position and click "OK" to close the window with saving the changes.
Use the command line
Through the command line, all the same operations are performed as with the graphical interface, and even more, but in text mode. The main thing is to know their syntax and parameters.
The command "cmd" is responsible for invoking the command line.
- Open the shell and execute it.


In a previous article, we described the procedure in detail. After you have configured the server, you need to configure Windows clients (servers and workstations) to use the WSUS server to receive updates so that clients receive updates from the internal update server, and not from Microsoft Update servers via the Internet. In this article, we will look at how to configure clients to use the WSUS server by using Active Directory domain group policies.
AD group policies allow the administrator to automatically assign computers to different WSUS groups, eliminating the need to manually move computers between groups in the WSUS console and to keep these groups up to date. Assigning clients to different WSUS target groups is based on a label in the registry on the client (labels are set by Group Policy or by direct editing of the registry). This type of client mapping to WSUS is called client side targeting (Client side targeting).
It is assumed that our network will use two different update policies - a separate policy for installing updates for servers ( Servers) and for workstations ( Workstations) These two groups must be created in the WSUS console in the All Computers section.
Tip. The policy for using WSUS update server clients depends largely on the OU organizational structure in Active Directory and the rules for installing the update in the organization. In this article, we’ll only look at a private option that helps you understand the basic principles of using AD policies to install Windows updates.
First of all, you need to specify the rule for grouping computers in the WSUS console (targeting). By default, in the WSUS console, computers are assigned by the administrator to groups manually (server side targeting). This does not suit us, therefore, we indicate that computers are distributed in groups based on client side targeting (by a specific key in the client registry). To do this, in the WSUS console, go to Optionsand open the option Computers. Change the value to Use Group Policy or registry setting on computers(Use Group Policy or registry settings on computers). 
Now you can create a GPO to configure WSUS clients. Open the Group Policy Management domain console and create two new group policies: ServerWSUSPolicy and WorkstationWSUSPolicy.
WSUS Group Policy for Windows Servers
Let's start with a description of the server policy. ServerWSUSPolicy.
The settings of the group policies responsible for the operation of the Windows Update service are located in the GPO section: Computer Configuration -> Policies-> Administrative templates-> Windows Component-> Windows Update (Computer Configuration -\u003e Administrative Templates -\u003e Windows Components -\u003e Windows Update).

In our organization, we intend to use this policy to install WSUS updates on Windows servers. It is assumed that all computers that fall under this policy will be assigned to the Servers group in the WSUS console. In addition, we want to prohibit the automatic installation of updates on servers when they are received. The WSUS client should simply download the available updates to disk, display a notification about the availability of new updates in the system tray and wait for the administrator to start the installation (manual or remote using) to start the installation. This means that productive servers will not automatically install updates and reboot without administrator confirmation (usually these tasks are performed by the system administrator as part of monthly scheduled maintenance work). To implement such a scheme, we will set the following policies:
- Configure Automatic Updates (Configure automatic updates): Enable. 3 - Auto download and notify for install (Automatically download updates and notify of their readiness for installation) - the client automatically downloads new updates and notifies them of their appearance;
- Specify Intranet Microsoft update service location (Indicate the location of Microsoft Update Service on the intranet): Enable. Set the intranet update service for detecting updates (Specify an intranet update service to search for updates): http: //srv-wsus.site: 8530, Set the intranet statistics server (Specify the statistics server on the intranet): http: //srv-wsus.site: 8530 - here you need to specify the address of your WSUS server and statistics server (usually they coincide);
- No auto-restart with logged on users for scheduled automatic updates installations (Do not restart automatically when updates are automatically installed if the user is working on the system): Enable- prohibit automatic reboot in the presence of a user session;
- Enable client-side targeting (Allow client to join the target group): Enable. Target group name for this computer: Servers - in the WSUS console, assign clients to the Servers group.
Note. When setting up the update policy, we advise you to carefully familiarize yourself with all the settings available in each of the options in the GPO section Windows Update and set the appropriate options for your infrastructure and organization.
WSUS Updates Installation Policy for Workstations
We assume that updates to client workstations, unlike server policies, will be installed automatically at night immediately after receiving updates. Computers after installing updates should restart automatically (warning the user in 5 minutes).
In this GPO (WorkstationWSUSPolicy) we specify:
- Allow Automatic Updates immediate installation (Allow immediate installation of automatic updates): Disabled - a ban on the immediate installation of updates upon receipt;
- Allow non-administrators to receive update notifications (Allow non-administrators to receive update notifications): Enabled - Show non-administrators a warning about new updates and allow their manual installation;
- Configure Automatic Updates:Enabled. Configure automatic updating: 4 - Auto download and schedule the install. Scheduled install day: 0 - Every day. Scheduled install time: 05:00 - upon receipt of new updates, the client downloads to the local cache and plans to automatically install them at 5:00 in the morning;
- Target group name for this computer: Workstations- in the WSUS console, assign the client to the Workstations group;
- No auto-restart with logged on users for scheduled automatic updates installations: Disabled- the system will automatically reboot after 5 minutes after the installation of updates;
- Specify Intranet Microsoft update service location: Enable. Set the intranet update service for detecting updates: http: //srv-wsus.site: 8530, Set the intranet statistics server: http: //srv-wsus.site: 8530 –– corporate WSUS server address.

On Windows 10 1607 and later, although you told them to receive updates from the internal WSUS, they may still try to access Windows Update servers on the Internet. This "feature" is called Dual Scan. To disable receiving updates from the Internet, you must additionally enable the policy Do not allow update deferral policies to cause scans against Windows Update ().
Tip. To improve the “patched level” of computers in the organization, in both policies you can configure the forced start of the update service (wuauserv) on clients. For this, in the section Computer Configuration -\u003e Policies-\u003e Windows Setings -\u003e Security Settings -\u003e System Services find the Windows Update service and set it to start automatically ( Automatic).
Assign WSUS Policies to Active Directory OU
The next step is to assign the created policies to the appropriate Active Directory containers (OU). In our example, the OU structure in the AD domain is as simple as possible: there are two containers - Servers (it contains all the organization’s servers, in addition to domain controllers) and WKS (Workstations — user computers).
Tip. We are considering only one fairly simple option for binding WSUS policies to clients. In real organizations, it is possible to bind one WSUS policy to all domain computers (a GPO with WSUS settings is hung on the root of the domain), distribute different types of clients into different OUs (as in our example, we created different WSUS policies for servers and workstations), in large distributed domains can be linked, or assign a GPO based on, or combine these methods.
To assign a policy to an OU, click on the desired OU in the Group Policy Management Console, select the menu item Link as Existing GPO and select the appropriate policy.

Tip. Do not forget about a separate OU with domain controllers (Domain Controllers); in most cases, the WSUS server policy should be assigned to this container.
In exactly the same way, you need to assign the WorkstationWSUSPolicy policy to the AD WKS container in which the Windows workstations are located.
It remains to update the group policies on the clients to bind the client to the WSUS server:
All settings of the Windows update system that we set by group policies should appear in the client registry in the branch HKEY_LOCAL_MACHINE \\ SOFTWARE \\ Policies \\ Microsoft \\ Windows \\ WindowsUpdate.
This reg file can be used to transfer WSUS settings to other computers on which it is not possible to configure update settings using GPO (computers in a workgroup, isolated segments, DMZ, etc.)
Windows Registry Editor Version 5.00
"WUServer" \u003d "http: //srv-wsus.site: 8530"
"WUStatusServer" \u003d "http: //srv-wsus.site: 8530"
"UpdateServiceUrlAlternate" \u003d ""
"TargetGroupEnabled" \u003d dword: 00000001
"TargetGroup" \u003d "Servers"
"ElevateNonAdmins" \u003d dword: 00000000
"NoAutoUpdate" \u003d dword: 00000000 -
"AUOptions" \u003d dword: 00000003
"ScheduledInstallDay" \u003d dword: 00000000
"ScheduledInstallTime" \u003d dword: 00000003
"ScheduledInstallEveryWeek" \u003d dword: 00000001
"UseWUServer" \u003d dword: 00000001
"NoAutoRebootWithLoggedOnUsers" \u003d dword: 00000001

It is also convenient to monitor the applied WSUS settings on clients using rsop.msc.
And after a while (depending on the number of updates and channel bandwidth to the WSUS server), you need to check in the tray the pop-up alerts for new updates. Clients should appear in the corresponding groups in the WSUS console (the table displays the name of the client, IP, OS, the percentage of their “patches” and the date of the last status update). Because we have assigned computers and servers to different WSUS groups by politicians, they will only receive updates approved for installation on the corresponding WSUS groups.

Note. If updates do not appear on the client, it is recommended that you carefully examine the log of the Windows update service on the problem client (C: \\ Windows \\ WindowsUpdate.log). Please note that in Windows 10 (Windows Server 2016) is used. The client downloads updates to the local folder C: \\ Windows \\ SoftwareDistribution \\ Download. To start the search for new updates on the WSUS server, you need to run the command:
wuauclt / detectnow
Also, sometimes you have to force the client to re-register on the WSUS server:
wuauclt / detectnow / resetAuthorization
In especially difficult cases, you can try to repair the wuauserv service. If this occurs, try changing the frequency of checking for updates on the WSUS server using the Automatic Update detection frequency policy.
In the next article, we describe the features. We also recommend that you read the article between groups on the WSUS server.
Solving the security problems of a computing system, one has to consider a whole range of problems, one of which is the timely updating of operating systems and software.
Introduction
To maintain the current state of the operating systems and software of the company's information system, they should be regularly updated. These actions can be performed from the Microsoft Update site by each client computer or through the use of Windows Server Update Services (WSUS) server / s. If we are talking about a corporate network, then the recommended option is to use a WSUS server. When working with the aforementioned service, a significant reduction in Internet traffic is achieved and the ability to centrally manage the deployment of system patches and software received from Microsoft is provided.
I would also like to note that on March 23, 2011, Microsoft announced the release of a new product, “Windows Intune”, one of the functions of which will be the fulfillment of those tasks for which WSUS was previously responsible.
In order to be able to update client computers, it is necessary:
1. Perform solution design
2. Deploy the WSUS server / servers;
3. Ensure regular synchronization of the WSUS server with the Microsoft Update resource;
4. Configure server / WSUS server operation parameters;
5. Create target groups and place client computers in target groups on the WSUS server.
6. Configure clients to use WSUS servers;
7. Secure the WSUS server / servers.
In this article we do not consider the stages of design and deployment, synchronization, we will focus on setting up clients and ensuring the security of the WSUS server.
Configuring update server clients without using group policies
Configuring clients to use the WSUS server is possible in three ways:
- Using Group Policy;
- Using the local computer policy;
- Direct changes to the register of customer stations.
The best way is to use Group Policy Objects, see fig. 1, bound to the required AD container (for Windows 2003) or AD DS (for Windows 2008), but this option is only possible if the Active Directory directory service is deployed in your organization. The Group Policy capabilities to configure interaction with the management server and manage client update procedures fully satisfy the needs of the administrator. What we can verify by looking at fig. 1. The list of available settings is quite wide.

Fig. 1. WSUS client settings.
If the directory service is not deployed in the organization, then you can implement the client’s ability to interact with WSUS either through local policy, or by “directly” making changes to the system registry of the workstation or server, the status of which we want to ensure. In essence, politics is nothing but an interface to the registry.
Circumstances in which workstations and servers are not AD clients can occur in a number of cases, for example:
· Using the catalog service of third parties, however, solutions based on Microsoft operating systems are used as application servers, file servers, client workstations;
· The need to build a "guest" zone to provide access to "external" users to the Internet;
· Not enough "maturity" of the company, due to which a centralized catalog service is not deployed, or lack of need for the specified service.
1. It is necessary to host the update service on the intranet and the statistics server, as well as to distribute clients into groups.
In the registry key
you will need to specify the address or name of the update server to which the client will connect and the port number that is selected to work with the WSUS server. The default is port 80.
"WUStatusServer" \u003d http: //192.168.1.100
Since it is necessary to place client computers in target groups, we must indicate in which of the target groups the computer should be placed:
"TargetGroupEnabled" \u003d dword: 00000001
In our version, the target group is called “WSUS-Test-WKS”. For customers whose target group name will be different, a different value is specified in this field. The TargetGroupEnabled parameter in this case provides control of the placement in the group from the client side.
To do this, in the registry key
"TargetGroup" \u003d "WSUS-Test-WKS"
"TargetGroupEnabled" \u003d dword: 00000001
"WUServer" \u003d "http://192.168.1.100"
"WUStatusServer" \u003d "http://192.168.1.100"
"NoAutoUpdate" \u003d dword: 00000000
"AUOptions" \u003d dword: 00000004
"ScheduledInstallDay" \u003d dword: 00000000
"ScheduledInstallTime" \u003d dword: 00000009
"UseWUServer" \u003d dword: 00000001
"RescheduleWaitTime" \u003d dword: 00000001
" NoAutoRebootWithLoggedOnUsers "\u003ddword: 00000000
Having ensured the delivery and execution of the specified file, we can configure the WSUS server clients without resorting to the use of group policies. All registry variables that can be used to work with the update server and their possible values \u200b\u200bare described in the Windows Server Update Services 3.0 SP2 Deployment Guide.
To ensure the security of the update server itself, it makes sense to follow a series of simple recommendations:
1. If we need to ensure secure information exchange between clients and servers and / or between WSUS servers, then the possibility of using the SSL protocol is provided. See the "Securing WSUS with the Secure Sockets Layer" section in the Windows Server Update Services Deployment Guide (). In the absence of network exchange between servers, data transfer is provided through an external medium. An alternative method of protection, if it is impossible to use SSL, is to use the IPsec protocol. See "Overview of IPsec Deployment" http://go.microsoft.com/fwlink/?LinkId\u003d45154.
2. The WSUS server, which synchronizes with Microsoft Update, should be located behind the firewall and should be accessible only to those nodes that really need it. See the “Configure the Firewall” section of the Windows Server Update Services Deployment Guide (http://go.microsoft.com/fwlink/?LinkId\u003d79983).
3. As for file access, you should not provide excessive permissions to resources; a description of access rights requirements is provided in the "Before You Begin" section of the Windows Server Update Services Deployment Guide (http://go.microsoft.com/fwlink/ ? LinkId \u003d 79983).
4. If the update server has Internet access (in some cases this may not be, for example, synchronization with another WSUS server that has this capability is performed), then it is recommended that its database be placed on another computer, access from outside of which is impossible. See “Appendix B: Configure Remote SQL” in the Windows Server Update Services Deployment Guide (http://go.microsoft.com/fwlink/?LinkId\u003d79983).
5. To manage the WSUS server, it is wise to use the built-in WSUS Administrators group that will be created during deployment.
Leonid Shapiro.
List of references.
Anita Taylor Windows Server Update Services 3.0 SP2 Deployment Guide.
Anita Taylor Windows Server Update Services 3.0 SP2 Operations Guide
[i] DMZ - demilitarizedzone
Not all are covered here, but only the basic WSUS client settings.
You can specify the path to the servers you are looking for using the address that was done in the above example, or using the server name, while providing for the possibility of resolving the server name to its IP address.
This is the abstract name of the test group.
With the development of the Internet, constant updating of the operating system has become commonplace. Now developers can fix and modify the system throughout the entire period of its support. But frequent updates to Windows 10 are not always convenient. That is why it would be nice to be able to turn them off.
Reasons to disable automatic updates
The reasons can be very different, and only you can decide how much you need to disable updates. It should be borne in mind that along with improvements to various capabilities, important fixes for system vulnerabilities are delivered. And yet, situations where it is worth disconnecting independent updates arise quite often:
- paid internet - sometimes the update is very large and downloading it can be expensive if you pay for traffic. In this case, it is better to postpone the download and download later under other conditions;
- lack of time - after downloading the update will begin to be installed during the shutdown of the computer. This can be inconvenient if you need to quickly shut down, for example, on a laptop. But even worse here is that sooner or later, Windows 10 will require you to restart the computer, and if you do not, then after some time the restart will be forced. All this distracts and interferes with work;
- security - although updates themselves often contain important changes to the system, no one can ever foresee everything. As a result, some updates may open your system for a virus attack, while others simply disrupt its operation immediately after installation. A reasonable approach in this situation is to update some time after the release of the next version, after having studied the reviews.
Disable Windows 10 Automatic Updates
There are many ways to turn off the Windows 10 update. Some of them are very simple for the user, others are more complicated, and others require the installation of third-party programs.
Disconnect via Update Center
Using the update center to disable is not the best option, although Microsoft developers offer it as an official solution. You can really turn off the automatic download of updates through their settings. The problem here is that this solution will somehow be temporary. The release of a major Windows 10 update will change this setting and return system updates. But we will still learn the shutdown process:
After these changes, minor updates will no longer be installed. But this solution will not help you get rid of downloading updates forever.
Bluetooth