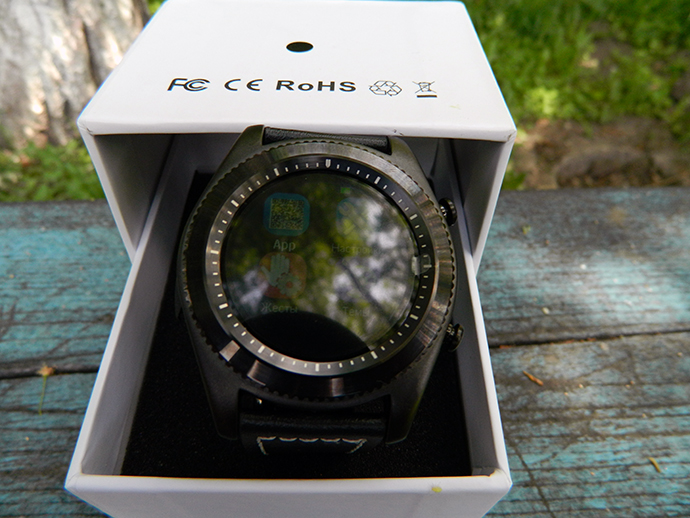
VoIP Phones Yealink appeared on the Russian market relatively recently. But despite the fact that the manufacturing company is completely Chinese, its products have already earned credibility and recognition. Here and a very good quality of performance of the devices themselves, and reliability, and ease of setup. And most importantly - all this for a reasonable price. Most popular models Yealink SIP T19 / T19P, SIP T21 / T21P, T22P, T26P actively bought both by individuals and various firms and companies.
As part of this post, I will tell you how to set up a Yealink IP phone to work with a new popular service from Rostelecom - a cloud-based PBX that works through the Internet and allows you to connect a landline phone number or an 8-800 format number to any point that has access to the global network.
Instructions for setting up an IP phone:
We connect the Yealink SIP phone to the LAN port of the router. At the same time, the DHCP server must be enabled on the latter, otherwise the phone will not be able to obtain an IP address.
After that, click OK on the phone. A menu is displayed on the screen, in which you need to select the item Status. Selecting it, you will see information about the current status of the phone:

We are interested in the IP field. Next, you need to open any web browser on your computer (Internet Explorer and Google Chrome are best suited for these purposes) and enter this IP address in the address bar. If everything was done correctly, the result will be an authorization form for access to the settings of the SIP phone. The default username is admin, the password is admin.
To configure the connection to the cloud PBX Rostelecom you need to go to the menu section Account:

In the list of accounts, select Account 1. Below we see that the SIP account is enabled, in the field "Label" you can write any name for the connection. Same thing with the Display Name field.
But in the fields "Registration Name", "Username" and "Password" you need to enter the data that you were given at the conclusion of the contract.
In the "Transport" list, set the value to "UDP".
It remains only to specify the address of the SIP server for the connection and port. This data should also be provided to you upon connection.
Click the Save button and check the registration status. If everything is done correctly, the value will be “Registered”.
Yealink SIP phone setup is complete and you can make calls,
Yealink is an entry-level, high-quality IP phone with the functionality and performance that is typically found in more advanced IP phones. High-quality expensive plastic in combination with a clear LCD display with a resolution of 132 × 64 pixels guarantee the convenience and comfort of working with this phone. And two network ports allow you to quickly and without any problems connect the SIP-T19 \u200b\u200bE2 to the network and start working with it. The device supports one VoIP account, such convenient network technologies as VLAN and QoS, as well as SRTP / HTTPS / TLS security protocols. Of the additional features of the phone, it is necessary to note the support of wired headsets and the possibility of mounting on the wall. SIP-T19 \u200b\u200bE2 is one of the best phones on the market for equipping workplaces of ordinary employees of the company.
1. Features:
- 132 × 64 dots LCD
- Two 10/100 Mbps Ethernet ports
- Support 1 SIP account
- Wired Headset Support
- Wall mount option
- Easy to install and configure
2. Connection:
First you need to connect us with a telephone. To do this, insert the patch cord (cable) from the router (switch) into the internet connector and turn on the power supply to the outlet (Fig. 1.):
Fig 1. The program settings interface.
3. Setup:
First, we need to find out his IP address to configure the phone through the Web-based Interface on the computer. To do this, select the "menu" - "status" item on the display, and remember the "IP address" displayed on the phone.
We enter it in the browser on the computer and get to the authorization page. By default, the username and password are admin (Fig. 2):

On the page, select the Account tab and configure Our Sip-Account:
- Account - included
- Label - login from Sip-Account of the form 100 ****
- Display name - your login
- Registration Name - your login
- Username - your login
- Password - password from Sip account
- Sip server address - pbx1.new-tel.pro
- Registration period – 50
- Transport - TCP or UDP
Filling in the fields from your personal account to the phone is shown in (Fig. 3):

Fig 3. Filling data
Click the “Save” button.
In your personal account, the extension number is displayed in blue. This means that this SIP-Account has successfully connected to our system (Fig. 4):

Data on Sip Accounts in lk 10th Account is active.
This completes the process of setting up and creating a Sip Account and you can make outgoing calls. A correctly configured phone displays the indicator of the connected line and the name of the Sip account (Fig. 5.)

Figure 5 Connected Phone
Note:
- If you enter the password incorrectly several times, further registration of the Sip Account will be terminated, since your IP address will be blacklisted to us. To do this, you will need to contact the technical support of our company.
- Please note: Password is case sensitive. This means that passwords like “qwerty” and “Qwerty” are completely different passwords!
- If Sip-Account registration is lost or registration is not available, then try changing your current telephony transport. To do this, go to the "Account" and at the bottom of the settings select instead of UDP - TCP transport (or vice versa). Also try changing the “Registration Period” to 50 instead of 3600.
The IP phone connects to the Internet using an Ethernet cable.
The choice of the necessary options and settings is carried out using the buttons on the device. Before starting setup, we recommend that you reset your phone to factory settings. To do this, go to the menu on the device Setup / System The default password is admin, then select Reset, wait until the phone reboots.
For further configuration, you need to know which IP address was assigned to your IP phone:
Push button MENU,press Status
We write the IP address
To enter the web-based interface, enter this address in the browser line (for example, http://192.168.3.130). To enter the device’s web-interface, your computer must be located on the same local network with the phone. Login: Password default admin/ admin.
Network configuration
If you need to use a static IP address, go to the menu Network,we change DHCP to the Static IP address.
Enter the IP address of the phone, Gateway, Mask and DNS issued by the provider.
at the end of the setting do not forget to press the button Save.
Tone Adjustment
Time from DHCP server: Disabled
Time zone: +3 Russia (Moscow)
NTP By DHCP Priority: Low
NTP server 1: ru.pool.ntp.org
Daylight Saving Time: Disabled
Set time manually: Disabled
Time format: 24 hours
SIP account setup
Rooms / Employee Number /Sipaccount

Label:account name, which is displayed on the phone display
Registration Name:
Username:
Password:
UseOutbound-server: Included
Outbound-server: 195.239.174.100
Address Sip-servers:
Registration period: enter 120 ms.
At the end, we must press the button Save.
We activate the account by setting in the field Account value Includedand press again Save.

If the settings are made correctly, then the registration status will change to “Registered”, which indicates successful registration and readiness to make calls.
Go to the submenu Codecs, we leave only the PCMA, PCMU and G729 codecs.

Set the Early Media field to Enabled.
Set the Distinctive Ring Tones field to Enabled.

Accountsubmenu Account) :
SIP-PHONE SETTING WITH THE PANASONIC KX-TGP600
Phone hardware installationThe selection of the necessary options and settings is carried out using special keys under the screen of the DECT handset. Transitions on the menu of the device (LCD screen) are performed using the navigation keys.
The base DECT station (BS) is connected to the provider's network using an Ethernet cable connected to the LAN port of the telephone. StaticIP or DHCP mode. DHCP mode is set by default.
By default, after loading the device, the menu language is Russian.
The language can also be set manually. To do this, using the DECT tube, do:
Menu -\u003e Setting Handset -\u003e Ok -\u003e Display Option -\u003e Ok -\u003e Language -\u003e Ok -\u003eRUSSIAN –> OK.
The handset downloads Russian, reboot and accept the settings.
Option - DHCP
The cable from the BS kit is connected to the “LAN” port of the IP phone itself and to any “LAN” port of your router, or the router of the provider that provides you Internet access.

Option - Static IP (Static IP)

Enter BS settings
Web access

Open a WEB browser and in the address field enter the IP address obtained from Chapter 2 of this manual. You will be taken to the login and password request page. By default for the administrator account:
Please note that for the administrator account in the web interface is always English is used.
Date / Time Display Setting

Push Save.
SIP account setup
Data for registering a SIP account can be obtained in the cloud PBX web interface. On the menu Rooms / Employee Number /Sipaccountmake sure that the SIP account service is enabled. If necessary, change the password to a new one.

Phone Number:enter SIP User ID (phone number)
Registrar Server Address:enter Domain mpbx.sip.beeline.ru
Proxy Server Address:enter Domain mpbx.sip.beeline.ru
Outbound Proxy Server Address: leave blank
Service Domain:enter Domain mpbx.sip.beeline.ru
Authentication ID: enter Authorization User ID (phone @ mpbx.sip.beeline.ru)
Authentication Password: enter the password specified in the Cloud PBX portal REGISTER Expires Timer: enter the value of 120 ms
Enable SSAF (SIP Source Address Filter):set the value Yes

At the end we press the button Save.
After saving the settings, the phone will start connecting to the SIP server. The result can be seen in the menu. Status -> VoIPStatus:

If the settings are made correctly, then the registration status will change to “Registered”, which indicates successful registration and readiness to make calls.
Go to the submenu VoIP Settings -\u003e Line 1, configure the codecs as in the figure.

The remaining parameters are left by default.
Push Save.
Enable / disable multi-channel mode
Go to the menu System submenu System setting
We expose in the field Enable Multi Numbervalue Yessave settings Save.
BS reboot.
Multichannel Line Parameters
BS can be used with 8 handsets. You can assign up to 8 different phone numbers to the handsets. Each available phone number (line) can be assigned to handsets to handle incoming and outgoing calls.
Example 1
The following programming example shows a setting in which the handsets are assigned their own phone numbers, and the handsets also have a common phone number.

Case 1
A call to "1111" will be accepted by handset 1.
Case 2
Call by number "2222" will be accepted by handset 2.
Case 3
A call to “8888” will be answered by handsets 1–6.
When you receive an alert call, handset 1 will automatically receive the call.
Example 2

Case 1
When the user picks up handset 1, by default, line 1 is captured and a number is dialed. Lines 2 and 3 can also be captured for dialing.
Case 2
When the user picks up handset 2, by default, line 2 is captured and a number is dialed. Lines 1 and 3 can also be captured for dialing.
Case 3
When the user picks up handset 3, by default, line 3 is captured and a number is dialed. Lines 1 and 2 can also be captured for dialing.
Call problems
If you find audibility problems during a call, one subscriber does not hear the other, or the incoming connection does not work, then try to reduce the registration time on the telephone server. (Menu VoIPsubmenu SIP Settings -\u003e Line No.)
Handset Registration on the KX-TGP600
The handset can be registered to no more than 4 base units. The base unit can be registered on up to 8 handsets.
For the handset and base unit, pre-registration has been completed. If for some reason the handset is not registered to the base unit (for example, the signal strength is insufficient even if the handset is next to the base unit), re-register the handset.
Handset Registration
When connecting a new handset:
1. Base unit:
Press and hold the handset search button for about 3 seconds.
The STATUS indicator of the base unit will flash slowly in red.
2. Unregistered handset:
Simplified Registration
In standby mode, press and hold Ok before the message appears
"WAIT ...".
"REGISTERED".
Standard Registration

When registration is completed, the LCD will display a message
"REGISTERED".
Problems registering a DECT tube.
If the DECT handset (DECT telephone) is not registered (registration is lost) on the BS, you must delete the previously selected BS in the DECT handset and register again. To do this, do the following:
Menu -> Setting Handset -> Ok -> System Option -> Ok -> Cancel Base -> Ok -> select base (Base 1) -> Ok -> Yes -> Ok
The base station will be deleted. After that, you can re-register the DECT handset (DECT phone) on the BS, as described in the previous section.
INTERNET CHANNEL REQUIREMENTS
Channel width at least 100 kbit / s for each simultaneous conversation;
Packet loss should not exceed 2%;
Packet delaysno more than 150 mlsec.
Deviation from the average level of delay (jitter)no more than 20 mlsec.
TYPICAL SETTINGS OF ACCESS RESTRICTION SYSTEMS (FIREWALL, ROUTERS)
For the service to work, it is necessary to open the following addresses / protocols / ports on the firewall / router:
For the passage of SIP messages 195.239.174.100 / UDP / 5060
For voice passing RTP 195.239.174.71 / UDP / 1024-65535