Elena Shramenko
CEO
"Akintsev and Partners" company
“I would like to say a few words about the mobile application designer from AppGlobal.
We recently developed our application based on the AppGlobal constructor. And every day we are revealing more and more capabilities of this tool, with which you can implement a variety of tasks.
Firstly, I realized that this tool is of great benefit to both parties: for us, as the owners of the application, and for our clients who use this application.
By solving our marketing problems, we give our clients additional benefits:
They have at their fingertips all the information on a topic that interests them, and get the opportunity to study materials that are not freely available. They can take advantage of discounts and gifts that are only active through the app. They also have the opportunity to pay for your service or delivery from the application and make a free call.
Thanks to this, we get regular customers and attract new ones.”

Ilya Basnin
AppGlobal partner
“The big disadvantage of all other services is the lack of technical support.
I have analyzed many constructors.
Most often, simple inexpensive platforms are used, the owners of which simply copy AppGlobal materials, but the designer itself remains “raw” and unfinished.
Their big disadvantage is the lack of support. And, despite the low prices, they still cannot withstand the competition.”

Arthur Budovsky
“Sales increased by 14% in the first month of using the mobile application!
I write selling texts and teach people this art. The level of trust my readers have in me has increased only because there is a mobile application. Like, if my School is in Apstore and Google Play, it means that I have a solid business, and not some kind of “scam”. People buy trainings without even downloading the app to their phone.
The AppGlobal constructor itself is a mega-tool! You can create a full-fledged application yourself, without special programming knowledge, in just a couple of hours! The only thing is that I would like to be able to make different interfaces, because all applications are similar to each other due to the buttons.
Now I post audio and video materials and information tabs in my mobile application. There is a subscription to news and integration with social networks. I use push notifications for my readers. There is feedback such as receiving messages, photos from clients.
Despite the fact that the launch of my product was delayed due to moderation, I am very pleased with the cooperation with the AppGlobal service. Problems are resolved quite quickly, consultants help to sort out all the issues.
My site now lives a mobile life. I really hope that my clients and readers will appreciate my mobile application and come back to me more than once!
Thank you AppGlobal for simple solutions to complex but important issues!”
We will tell you how to make money not only by downloading other people's applications, but also by creating and promoting your own.
Dear reader! Our articles talk about typical ways to resolve legal issues, but each case is unique.
If you want to know how to solve exactly your problem - contact the online consultant form on the right or call by phone.

It's fast and free!
How to create your own application?
In order to start earning money, you need to create the application itself and place it on the Android Market.
You can make money on your Android application in three ways:
- Create a unique application and receive money for downloading it by other users. To do this, the application must be up to date and work without problems or errors.
- Create your own free application. In this case, the user receives money for advertising in the application.
- Adding paid features to free applications.
But it is worth emphasizing that in some countries, for example, such as Ukraine and Belarus, it is prohibited to sell applications. In Russia, there is no such ban and anyone can start making money on their Android.
What is needed to create your own application? If previously programming skills were required to create an application, now anyone can start creating their own application.
Today there are several services that allow you to build your application like a designer.
- The first service is Ibuildapp. This is an excellent tool thanks to which any user can create their own unique and interesting application. To start using it you do not need programming or other special skills. The important thing is that this service has a Russian-language version, which makes working with it even easier and more convenient. You can use this tool absolutely free by selecting “free use mode”. The user can create applications and publish them without restrictions.
- The second tool is Appsgeyser. The functionality of this service comes down to one task - to “sew” the site into your application. The result is a converter of website content into an application. If you have your own Internet resource and want to transfer its functionality into an application, then you won’t find a better tool than this. In addition, you can create an application not only from websites, but also from YouTube.
- You can also create your own application using the Theappbuilder service. Just like the previous tools, this service is completely free, which is great for first-time creators. Thanks to the beautiful and clear interface, working with the tool is pleasant and very convenient. To create your own application, the user only needs to select one of the proposed templates and remake it as desired. This service works in design mode.
- Appsmakerstore is also a very simple service for creating applications in a few clicks. The advantage is that using it you can create applications for six different platforms at once. The service supports Russian language. Just like other similar tools, Appsmakerstore has a free version.
So, in order to create your own application for Android, without having any special skills, you need to go to the website of any design service and “assemble” your application from ready-made templates.
You can also order the creation of an application from professionals. The cost of such work will be approximately $100 depending on the application that needs to be done.
Monetization
The most common way to monetize an application, but not very effective, is built-in advertising. The essence of this method is that the application is freely available, but advertising is built into it. Using an application or playing a game, the user will see advertising and click on it, and the creator of the application will receive money for this.
The in-app purchases function is quite interesting. Thanks to this feature, the player has access to additional features of the game or application that can be purchased for real money. In addition, without this it is impossible to complete many famous applications. This method of monetization brings in much more income than earnings from advertising, but it is also more difficult to implement in-app purchases. Such applications are very beneficial for the user, because he does not have to pay at the very beginning. If the app is fun and interesting, then players are more likely to start spending real money.
Paid applications
Although free apps are quite popular, many users buy games and programs for Android. To download and pay for the application you like, you should get a payment card confirmed in your wallet in your Google account. After the money is debited from the account, the game or other application is downloaded and installed on the gadget.
It’s quite simple to start making money from selling games and applications: you need to download the application itself, specify its price, countries and regions, and publish it in the Android Market. The only drawback of this monetization method is that in order to promote and popularize the game, you need to regularly devote some time and attention, because users will not pay money for incomprehensible applications.
How much can you earn
To start earning income from your application, it must not only be interesting and functional, but also popular. To receive significant income, the application must be downloaded at least 500,000 times. From the point of view of making money, stupid applications are more profitable than useful ones, but few people need them.
They often download various entertainment applications (only if they are interesting and different from their competitors).
If, after developing an application, the user decides to try to make money by showing ads in the application, then he needs to take into account several details. If the cost of a click on an advertisement is 1-5 cents, and an advertising banner is clicked once every 100-300 impressions, then to get $500, you will need approximately 500,000 - 1,000,000 advertising banners. Achieving this is quite possible, although difficult.
What does the amount of earnings depend on?
Income from created applications directly depends on their number, downloads and popularity. The more apps you create, the easier it is to compete with other users. Earnings from applications for the Android operating system, receiving commissions in this project can be calculated in more than one thousand dollars.
Other ways to make money on Android devices
Besides creating your own apps, there are other ways to make money on Android.
There are several types of applications that allow you to make good money:
- Photo apps, where earnings are based on the sale of photographs taken with a phone. The user can receive both thematic orders and simply sell photos to random buyers.
- Applications for viewing and consuming advertising. In such applications, you can mark your location in various establishments, shopping centers, supermarkets, scan barcodes of purchased goods, and watch videos containing advertising.
- Programs that collect information. By participating in research and answering surveys, the user receives money.
- Apps that pay to install other applications, programs, games.
Installing other people's applications for money
Installing applications for money is another opportunity to make money using your Android. To start earning money this way, you need to download the PFI app to your phone. After installing this application, you can start performing tasks, in particular, installing mobile applications. For each installed application, the user receives a monetary reward. This service also allows you to make money by attracting new users.
Another similar application is AppRating. Here you can make money in the same way by installing applications and games on your gadget. You can withdraw money to your mobile phone or webmoney.

Top applications for earning money
- Clashot is a great app for beginner photographers. All you need to do here is take photographs, upload them and sell them. The downside of this application is that the user cannot set a price for their photos. In addition, from the sale of a photo he gets only 44%, and the rest goes to the application.
- Earn Money. To start earning money, you need to download the application, and then watch videos, register on sites and perform other similar tasks. Payment is made through the PayPal payment system, and a quarter of a dollar is awarded for each attracted referral.
- AppTrailers– an application for making money, where you need to view trailers for applications, install demo versions, comment and rate them. The service is willing to pay money for this. For watching one video you can get 0.5$, and for installing a demo version of the application from 0.9 to 1$.
- ESPN Streak for the cash perfect for those who want to become a bookmaker. All you need to do here is predict the outcome of matches and games.
- AdKash. The essence of this application is that during an incoming call or message, banners with advertising will appear on the screen. It is for them that the user receives money.
Learning a new language and development environment is the minimum that is required of you if you want to write your first mobile application. It will take at least a couple of weeks to sketch out a basic todo list for Android or iOS without copying the example from the book. But you can not master Objective-C or Java and still quickly develop applications for smartphones if you use technologies such as PhoneGap.
If you have carefully studied the innovations that await us in Windows 8, you may have noticed that it will be possible to develop applications in HTML5 under it. The idea, in fact, is not new - technologies that implement the same approach for mobile platforms are developing by leaps and bounds. One of these frameworks, which allows you to develop applications for smartphones using a bunch of familiar HTML, JavaScript and CSS!, is PhoneGap. An application written with its help is suitable for all popular platforms: iOS, Android, Windows Phone, Blackberry, WebOS, Symbian and Bada. You will not need to learn the specifics of programming for each platform (for example, Objective-C in the case of iOS), or deal with various APIs and development environments. All you need to create a cross-platform mobile application is knowledge of HTML5 and a special PhoneGap API. In this case, the output will not be a stupid HTML page “framed” in the application interface, no! The framework's API allows you to use almost all phone capabilities that are used when developing using native tools: access to the accelerometer, compass, camera (video recording and photography), contact list, file system, notification system (standard notifications on the phone), storage, etc. etc. Finally, such an application can seamlessly access any cross-domain address. You can recreate native controls using frameworks like jQuery Mobile or Sencha, and the final program will look like it was written in a native language (or almost so) on a mobile phone. It is best to illustrate the above in practice, that is, write an application, so I suggest you start practicing right away. Keep track of the time - it will take hardly more than half an hour to do everything.
What will we create
Let’s take iOS as the target platform - yes, yes, the money is in the AppStore, and for now it’s best to monetize your developments there :). But let me make it clear right away: the same thing, without changes, can be done, say, for Android. I thought for a long time about which example to consider, since I didn’t want to write another tool to keep track of the to-do list. So I decided to create an application called “Geographic Reminder,” a navigation program whose purpose can be described in one phrase: “Let me know when I’m here again.” The AppStore has many utilities that allow you to “remember” the place where the user parked the car. It's almost the same thing, just a little simpler. You can point to a point on a city map, set a certain radius for it, and program a message. The next time you fall within the circle with the specified radius, the application will notify you and the point will be deleted. We will proceed according to this plan: first we will create a simple web application, test it in the browser, and then transfer it to the iOS platform using PhoneGap. It is very important to prototype and test the bulk of the code in a browser on a computer, since debugging an application on a phone is much more difficult. We will use the jQuery JS framework with jQuery Mobile (jquerymobile.com) as the framework, and Google Maps v3 as the map engine. The application will consist of two pages: a map and a list of points.
- A marker of your current position is placed on the map. By clicking on the map, a point is created to which a message is attached (like “car nearby”). A point can be deleted by clicking on it. To move a person's marker on the map, a geonavigation API is used.
- On the page with a list of points there should be an additional “Delete all points” button, and next to each point there should be a “Delete this point” button. If you click on an element in the list, the corresponding point will be displayed on the map. We will save the user settings and the list of points in localStorage.
UI frameworks
jQuery Mobile is, of course, not the only framework for creating a mobile interface. The PhoneGap website has a huge list of libraries and frameworks that you can use (phonegap.com/tools): Sencha Touch, Impact, Dojo Mobile, Zepto.js, etc.
Application framework
I’ll immediately explain why we will use jQuery Mobile. This JS library provides us with ready-made mobile application interface elements (as close as possible to native ones) for a variety of platforms. We need the output to be a mobile application, and not a page from a browser! So download the latest version of JQuery Mobile (jquerymobile.com/download) and transfer the first application files that we need to the working folder:
- images/ (move here all the images from the jq-mobile archive folder of the same name);
- index.css;
- index.html;
- index.js;
- jquery.js;
- jquery.mobile.min.css;
- jquery.mobile.min.js.
It is necessary to make the resources mostly local so that the user does not waste mobile Internet in the future. Now we create the page framework in the index.html file. The code below describes the top of the page with a map, the inscription “Geographic Reminder” and the “Points” button.
Map page
Georemembrance
PointsThe page attribute data-dom-cache="true" is necessary to ensure that it is not unloaded from memory. The Points button uses data-transition="pop" so that the Points List page opens with a pop-in effect. You can read more about how jQuery Mobile pages are structured in a good manual (bit.ly/vtXX3M). By analogy, we create a page with a list of points:
Point list page
Points
MapFor the “Map” button, we will also write data-transition="pop", but we will add the data-direction="reverse" attribute so that the “Map” page opens with the “Fade” effect. We will write the same attributes in the point template. That's it, our frame is ready.
Creating an application
Now we need to display the map, for which we will use the standard Google Maps API, which is used by millions of different sites:
Var latLng = new gm.LatLng(this.options.lat, this.options.lng); this.map = new gm.Map(element, ( zoom: this.options.zoom, // Select the initial zoom center: latLng, // Set the initial center mapTypeId: gm.MapTypeId.ROADMAP, // Normal map disableDoubleClickZoom: true, // Disable autozoom by tap/double-click disableDefaultUI: true // Disable all interface elements ));
Here Gm is a variable referencing the Google Maps object. I commented out the initialization parameters well in the code. The next step is to draw a man marker on the map:
This.person = new gm.Marker(( map: this.map, icon: new gm.MarkerImage(PERSON_SPRITE_URL, new gm.Size(48, 48)) ));
The address of the person sprite from Google panoramas is used as PERSON_SPRITE_URL. Its static address is maps.gstatic.com/mapfiles/cb/mod_cb_scout/cb_scout_sprite_api_003.png . The user will add points by clicking on the map, so to draw them we will listen to the click event:
Gm.event.addListener(this.map, "click", function (event) ( self.requestMessage(function (err, message) ( // Method that returns the text entered by the user if (err) return; // Method adds a dot to the active list and // draws it on the map self.addPoint(event.latLng, self.options.radius, message); self.updatePointsList(); // Redraw the list of points )); ), false);
I provide most of the code - look for the rest on the disk. Next we need to teach the application to move the user icon on the map. In the prototype, we use the Geolocation API (the one that is also used in desktop browsers):
If (navigator.geolocation) ( // Check if the browser supports geolocation function gpsSuccess(pos) ( var lat, lng; if (pos.coords) ( lat = pos.coords.latitude; lng = pos.coords.longitude; ) else ( lat = pos.latitude; lng = pos.longitude; ) self.movePerson(new gm.LatLng(lat, lng)); // Move the user icon ) // Every three seconds we request the current // position of the user window.setInterval (function () ( // Request the current position navigator.geolocation.getCurrentPosition(gpsSuccess, $.noop, ( enableHighAccuracy: true, maximumAge: 300000 )); ), 3000); )
The movePerson method uses a simple getPointsInBounds() procedure to check if the user is at any active point. Last question - where to store the list of points? HTML5 introduced the ability to use localStorage, so let's not neglect it (I'll leave you to figure out these parts of the code yourself, which I've commented out well). So, the application running in the browser is ready!
Launching a web application
As I said before, debugging mostly needs to be done on the computer. The most suitable browser for testing web applications on a computer is Safari or Chrome. After debugging in these browsers, you can be sure that your application will not work in a mobile phone browser. Both of these browsers are compatible with most mobile web browsers because they are built on the WebKit engine just like them. After eliminating all the bugs, you can proceed to launching the mobile web application directly on your phone. To do this, configure your web server (even Denwer or XAMPP) so that it serves the created page, and open it in your mobile phone browser. The application should look something like the one shown in the figure. It is important to understand here that the future mobile application compiled for the mobile platform using PhoneGap will look almost identical, except that the browser navigation bar will not be displayed on the screen. If all is well, you can start creating a full-fledged iOS application from the page. Please note that we haven’t even touched PhoneGap and the IDE for mobile development up to this point.
Preparation
In order to build an application for iOS, you need a computer with the Mac OS 10.6+ operating system (or a virtual machine on Mac OS 10.6), as well as the Xcode development environment with the iOS SDK installed. If you do not have the SDK installed, you will have to download a disk image from the Apple website that includes Xcode and the iOS SDK (developer.apple.com/devcenter/ios/index.action). Keep in mind that the image weighs about 4 GB. In addition, you will need to register on the Apple website as a developer (if you are not going to publish your application in the AppStore, then this requirement can be bypassed). Using this set, you can develop applications in the native iOS language Objective-C. But we decided to take a workaround and use PhoneGap, so we still need to install the PhoneGap iOS package. Just download the archive from the offsite (https://github.com/callback/phonegap/zipball/1.2.0), unpack it and run the installer in the iOS folder. When the installation is complete, the PhoneGap icon should appear in the Xcode projects menu. After launch, you will have to fill out several forms, but very soon you will see the IDE workspace with your first application. To check if everything is working, click the Run button - the iPhone/iPad emulator with the PhoneGap template application should start. The assembled program will generate an error saying that index.html was not found - this is normal. Open the folder in which you saved the primary project files and find the www subfolder in it. Drag it into the editor, click on the application icon in the list on the left and in the window that appears, select “Create folder references for any added folders”. If you run the program again, everything should work. Now we can copy all the files of our prototype to the www folder. It's time to tweak our prototype to work on a smartphone using PhoneGap processing.
Prototype transfer
First of all, you need to include phonegap-1.2.0.js in your index file. PhoneGap allows you to limit the list of hosts available for visiting. I suggest setting up such a “white list” right away. In the project menu, open Supporting Files/PhoneGap.plist, find the ExternalHosts item and add to it the following hosts that our application will access (these are Google Maps servers): *.gstatic.com, *.googleapis.com, maps.google. com. If you do not specify them, the program will display a warning in the console and the map will not be displayed. To initialize the web version of our application, we used the DOMReady event or the jQuery helper: $(document).ready(). PhoneGap generates a deviceready event, which indicates that the mobile device is ready. I suggest using this:
Document.addEventListener("deviceready", function () ( new Notificator($("#map-canvas")); // If the user does not have Internet, // notify him about it if (navigator.network.connection.type = == Connection.NONE) ( navigator.notification.alert("No Internet connection", $.noop, TITLE); ) ), false);  Let's prevent scrolling: document.addEventListener("touchmove", function (event) ( event.preventDefault(); ), false);
Then we will replace all alert and confirm calls with the native ones that PhoneGap provides us with:
Navigator.notification.confirm("Remove point?", function (button_id) ( if (button_id === 1) ( // OK button pressed self.removePoint(point); ) ), TITLE);
The last thing we need to change is the block of code that moves the user icon around the map. Our current code also works, but it works less optimally (it moves the icon even if the coordinates have not changed) and does not provide as rich data as the PhoneGap counterpart:
Navigator.geolocation.watchPosition(function (position) ( self.movePerson(new gm.LatLng(position.coords.latitude, position.coords.longitude)); ), function (error) ( navigator.notification.alert("code: " + error.code + "\nmessage: " + error.message, $.noop, TITLE); ), ( frequency: 3000 ));
This code is more elegant - it only generates an event when the coordinates have changed. Click the Run button and make sure that the application we just created works perfectly in the iOS device simulator! It's time to start launching on a real device.
Launch on device
Connect your iPhone, iPod or iPad to a computer running Xcode. The program will detect a new device and ask permission to use it for development. There is no point in refusing her :). Let me repeat once again: in order to run a written application on iOS, you must be an authorized iOS developer (in other words, be subscribed to the iOS Developer Program). This will only bother you if you are developing applications for Apple products; with other platforms (Android, Windows Phone) everything is much simpler. Those studying at a university have a chance to gain access to the program for free thanks to some benefits. Everyone else must pay $99 per year to participate in the program. Apple issues a certificate with which you can sign your code. The signed application is allowed to be launched on iOS and distributed in the App Store. If you are not a student, and you still feel sorry for $99 for innocent experiments, then there is another way - to deceive the system. You can create a self-signed certificate for code verification and run the mobile program on a jailbroken iOS device (I won’t dwell on this, because everything is described in as much detail as possible in this article: bit.ly/tD6xAf). One way or another, you will soon see a working application on the screen of your mobile phone. Stop the stopwatch. How long did it take you?
Other platforms
Besides PhoneGap, there are other platforms that allow you to create mobile applications without using native languages. Let's list the coolest players.
Appcelerator Titanium (www.appcelerator.com).
Titanium can build applications primarily for Android and iPhone, but it also claims to support BlackBerry. In addition to the framework itself, the project provides a set of native widgets and IDE. You can develop applications on Titanium for free, but you will have to pay for support and additional modules (from $49 per month). The price of some third-party modules reaches $120 per year. The developers of Appcelerator Titanium claim that more than 25 thousand applications have been written based on their framework. The project's source code is distributed under the Apache 2 license.
Corona SDK (www.anscamobile.com/corona).
This technology supports the main platforms - iOS and Android. The framework is aimed mainly at game development. Of course, the developers claim high-quality optimization on OpenGL. The platform does not have a free version, and the price is quite steep: $199 per year for a license for one platform and $349 per year for iOS and Android. Corona offers its own IDE and device emulators. Corona applications are written in a language similar to JavaScript.
Conclusion
We created a simple mobile web application and ported it to the iOS platform using PhoneGap in a few simple steps. We didn't write a single line of Objective-C code, but we got a program of decent quality, spending a minimum of time porting and learning the PhoneGap API. If you prefer another platform, for example Android or Windows Mobile 7, then you can just as easily, without any changes for these platforms, build our application (for each of them there is a good introductory manual and video tutorial: phonegap.com/start) . To verify the platform’s viability, you can look at ready-made applications on PhoneGap, which the technology developers have collected in a special gallery (phonegap.com/apps). In fact, PhoneGap is an ideal platform for creating at least a prototype of a future application. Its main advantages are speed and minimal costs, which are actively used by startups that are limited in resources in all respects. If the application fails, and for some reason you are no longer satisfied with the HTML+JS internals, you can always port the application to a native language. I can’t help but say that PhoneGap was originally developed by Nitobi as an open source project (the repository is located on GitHub: github.com/phonegap). The source code will continue to remain open, although Nitobi was acquired by Adobe last October. Need I say what prospects the project has with the support of such a giant?
Without financial investments and special knowledge.
Here are the simplest instructions on how to create a basic iOS application and try it on your device. Based on it, you can go further into the topic and create really useful programs.
Note for Windows users: to create applications for iOS you need to install OS X on a virtual machine (VirtualBox, VMware). This process is by no means simple and requires separate instructions.
1. Go to the App Store and install XCode development environment :

If you already have XCode, then you need to update it.
2. Launch xCode and select the menu item File -> New -> Project:
3. Select the platform and application type:

4. Provide information about the project. Please note that we have selected the "Universal" application type: 
5. Click on the button New Folder and indicate the name of the folder in which we will store the application files:

6. Uncheck the Create Git Repository checkbox and click the Create button. As a result, you should get to the start screen for working on the application: 
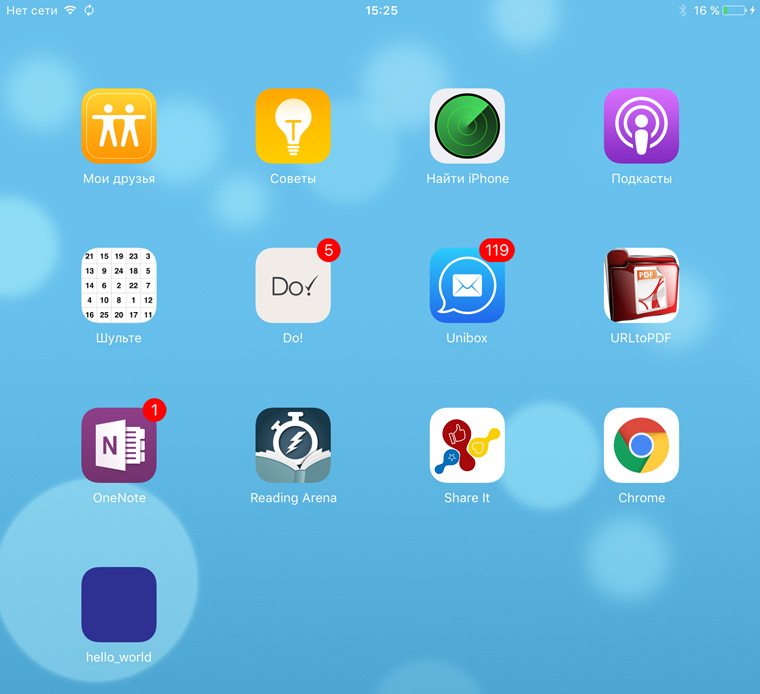
7. Click on the item Main.storyboard in the right menu, drag the element to the main field Label and add text to it Hello_world:

8. Now we need to make an icon for the application. We select a picture and upload it to mapappicon.com:
9. We wait for the web application to finish working and indicate your email address to receive the archive with icons:
![]()
10. Return to XCode and select section in the left menu Assets.xassets:
![]()
11. Open the archive from the mail and drag icons from there to the XCode workspace:
![]()
12. Select one of the device simulators, click on the application launch button (black triangle) and turn it on on your Mac Developer Mode:

13. We try to start again. We are waiting for iOS to load on the simulator:

14. Make sure the application is working:

We look at the finished application on the device
Now you can see how the application works on the device. Before following the instructions, make sure that you have the latest versions of XCode and iOS.
1. Let's go to xCode -> Preferences -> Accounts and add your Apple ID:

2. Connect the iOS device to the computer:

3. Select the desired device in the list and click on the start button. We're waiting for a while.
4. If a message about security problems appears, then on the iOS device go to Settings -> Basic -> Device management and allow applications from the developer to run with your Apple ID:


5. Go to the desktop and find the new application icon:
6. Launch:

7. Disconnect the device from the computer. Now the application can be used.
What to do if you want more?
Using scientific poking and Google, you can expand the above sequence of actions and create a more functional application. But you can only use it on your own devices.
After all, Apple places very high demands on applications. The App Store Review Guidelines include 29 points and more than a hundred sub-points. In order for an application to comply with them and be accepted for publication in the store, the developer requires a large amount of technical knowledge.
If you want to create high-quality iOS applications intended for mass use, you need to learn!

The programming language for mobile development on Android is very simple - Java. Google is now actively promoting Kotlin as a language that can replace Java. Applications are also written in C++.
Creating a simple application consists of several stages:
- project in Android Studio;
- creating a user interface;
- adding activities, navigation and actions;
- test drive the application in the emulator.
In the meantime, we are describing the basics, students of the “” course are already receiving money for their applications.
Required Tools
First of all, install the Android Studio program. It is the official development environment (IDE) for Android and runs on Windows, macOS and Linux. Although, when developing programs for Android, you can use other environments besides Android Studio.
If you do not have them installed on your computer Android SDK and other components, then Android Studio will automatically download them. Android SDK is a programming environment that includes libraries, executables, scripts, documentation, etc.
Android SDK compiles the code along with any data and resources into a file with the extension .apk. It contains everything you need to install the application on your Android device.

It is useful to install an emulator as well Android to run and test applications. The emulator comes bundled with Android Studio.

Once all the tools are installed, you can create your first project. But first you need to understand the basic concepts.
What does the application consist of?
on Android
An Android application consists of four components. Each component is an entry point through which the system or user can gain access.
- Activity (activity)- elements of interactive user interface.
One activity triggers another and communicates what the user intends to do through the Intent class. Activities are like web pages, and intents are like links between them. Launching the application is the Main activity. - Service (service)- a universal entry point for keeping the application running in the background.
This component performs long-running operations or work for remote processes without a visual interface. - Broadcast receiver(broadcast receiver) broadcasts intentions from the application to several participants.
- Content Provider(content provider) manages the application's shared data set from the file system, SQLite database, web, or other storage.
Now let's try to make our own application for Android.
Creating an Android application
in Android Studio
Step 1
Select the application name, company domain, project path and package name. We indicate whether to enable support for the optional programming languages C++ and Kotlin.
Step 2
We set one or more target platforms for assembly. For this purpose, SDK and AVD, the Android virtual device manager, are used. The tool allows you to install packages in the SDK that support multiple versions of the Android OS and multiple levels of APIs (application programming interfaces).
Reference
The lower the Android version, the more devices the application will run on. The higher the version, the richer the API functionality.
Step 3
We select the main activity that will be launched when you click on the application icon, and give it a name.

Step 4
After a few minutes of building, Android Studio opens the IDE interface. There are three main points here.
If you select the Android view from the drop-down menu, you will see the project files. For example, our main activity is called app > java > ru.skillbox.skillboxapp > FullscreenActivity. When creating the project, we specified instead of activity Main full screen activity.


Finally, the third important file app > manifests > AndroidManifest.xml describes the fundamental characteristics of the application and defines all its components.
Manifest Contents
<manifest xmlns:android = "http://schemas.android.com/apk/res/android" package="ru.skillbox.skillboxapp" > <application android:allowBackup ="true" android:icon ="@mipmap/ic_launcher" android:label ="@string/app_name" android:roundIcon ="@mipmap/ic_launcher_round" android:supportsRtl ="true" android:theme =" @style/AppTheme" > <activity android:name =".FullscreenActivity" android:configChanges = "orientation|keyboardHidden|screenSize" android:label ="@string/app_name" android:theme ="@style/FullscreenTheme" > <intent-filter > <action android:name ="android.intent.action.MAIN" /> <category android:name = "android.intent.category.LAUNCHER" /> intent-filter > activity > application > manifest >
Run on a real device
The application we created is a single activity that runs in full screen mode and has no graphical elements.
We run it on an Android device or in an emulator.
To do this, we connect a smartphone or tablet in USB debugging mode, which is activated in Developer settings on the menu Settings.
To launch in the emulator, click the button in Android Studio Run on the menu Run(Shift+F10). Select the appropriate device and OS version, portrait or landscape (landscape) orientation.

Android Studio will install the emulator and launch it.
Creating a simple user interface
The user interface of an Android application is created through a hierarchy layouts(layouts, ViewGroup objects) and widgets(View objects). Layouts control the placement of child widgets on the screen. Widgets themselves are directly UI components: buttons, text fields on the screen, etc.
The activity interface is created in Android Studio in the Layout Editor and is mostly stored in XML files.
- Open the file app > res > layout > activity_fullscreen.xml.
- Add widgets to the screen from the Palette by dragging the mouse.
- For example, take a text field (PlainText). This is an EditText widget where the user can enter text.
- Add buttons and other necessary elements.

You can also drag buttons and other elements onto the screen.
Adding actions, activities and navigation
Let's say we created an activity with a text field and a submit button. After this, you need to write what exactly will happen when you click the “Submit” button.
- Let's go into the code app > java > FullscreenActivity.
- Adding a method SendMessage() to class FullscreenActivity so that when the button is clicked, this method is called.
- We create intentions (Intent class) for transition from one activity to another, new activities, navigation and everything else that is necessary for the application.
And, of course, we begin to dream about how to monetize the application.
General rules
for Android applications
The Android application lives in its own sandbox, which is subject to Linux security rules:
- Each application is a separate user in a multi-user Linux system.
- By default, the system assigns each application a unique user ID, unknown to the application; all files are accessible only to this user ID.
- All processes have their own virtual machine (VM), so the executing code is isolated from other applications.
- By default, each application runs its own Linux process.
There are exceptions to the rules:
- It is possible to give two applications a common user ID so they can share files with each other. Large-scale vocational training program with guaranteed employment. Webinars, live meetings, hackathons and challenges from real clients. You gain skills in programming and creating apps for iPhone and Android, even if you've never done it before. You gain a concentration of experience from strong developers and founders of their own companies - teachers of our course.


