Like any other operating system, Android has programs that run in the background. They start automatically when you turn on the smartphone. Most of these processes are necessary for the operation of the system and are part of it. However, sometimes applications are found that consume too much system RAM and battery power. In this case, you will need to make your own efforts to improve performance and save battery power.
In order to disable autorun of software on a smartphone, you can use a third-party application, disable processes manually, or completely remove the program from the device. Let's figure out how to do this.
Be extremely careful when stopping running processes or uninstalling applications, as this may cause system crashes. Disable only those programs that you are 100% confident in. Tools such as alarm clock, calendar, navigator, mail, reminders and others must run in the background to perform their function.
Method 1: All-In-One Toolbox
A multifunctional program with which you can optimize system performance by, as well as disabling autorun applications.

This method, although simple, is not very reliable, since without it some applications will still launch. You can use it in combination with other methods described in the article. If your phone has root access, you can control autorun using programs or.
Method 2: Greenify
This tool allows you to analyze the work of applications in the background and temporarily “put to sleep” those that you are not currently using. Main advantages: no need to remove programs that may be needed in the future and availability for non-rooted devices.
- Download and install the application. Immediately after opening, a short description will appear, read and press the button "Further".
- The next window will ask you to indicate whether your device has root access. If you yourself have not taken any action to obtain it, then most likely you do not have it. Enter the appropriate value or select "I'm not sure" and press "Further".
- Check the box if you are using a screen lock and tap "Further".
- If you select rootless mode or you are not sure whether your device is rooted, a window will appear asking you to enable the accessibility service. Click "Settings".
- In the list that appears, click on the Greenify application.
- Enable automated hibernation.
- Go to the Greenify app again and click "Further".
- Complete the setup by reading the information provided. In the main window, click on the plus sign in the lower right corner of the screen.
- The application analysis window will open. With one click, select the programs you want to put to sleep. Click the checkmark in the lower right corner.
- The window that opens will show the applications that have been put to sleep and those that will be put to sleep after being disabled. If you want to put all programs to sleep at once, click the button "Zzz" in the lower right corner.


If problems occur, the application will notify you to enter additional settings, just follow the instructions. In the settings, you can create a hibernation shortcut that allows you to instantly put selected programs to sleep with one click.
Let's be honest: most of the interesting customization options for Droid devices are hidden and require rooting the device. However, not everyone prefers to get root - some out of fear of losing the warranty, others out of sheer laziness. We decided to look at alternative ways to speed up devices on the Google platform that do not require superuser rights.
Introduction
Google is constantly improving the performance of its system. But “pure” Android is now quite rare - manufacturers, as a rule, modify the firmware, which does not always have a positive effect on performance. In addition, in addition to this, it would be good to take care of energy saving, and these are often mutually exclusive things. Nevertheless, even non-rooted Android has such capabilities, although there are not very many of them.
Removing/disabling built-in and unnecessary applications
Before the release of the fourth version of Android, it was impossible to disable built-in applications without root rights. This brought inconvenience to buyers of branded gadgets, because each manufacturer strives to cram into the firmware as many programs as possible that the end user simply does not need and in total eat up a decent amount of resources. In the fourth version of Google, such an opportunity appeared. To disable any built-in application, you need to go to “Settings -> General -> Applications -> All”, select the desired software and in “Application Information” click the “Disable” button (or “Uninstall updates”, and then “Disable” "). To enable it, you need to go to the “Disabled” tab and follow a similar procedure.

However, not everything is as rosy as it seems at first glance. Firstly, disabling it does not affect persistent memory - the application remains installed as it was. Secondly, not everything can be turned off. Only some applications allow you to do this trick with yourself. I won't give a lot of specific advice on disabling applications, since the list of applications is different on each device. Here is a short list of what most users do not need, but constantly hangs in the system and takes up memory:
- “Browser” - why, if there are more convenient and easier alternatives?
- “Calendar” and “Calendar Memory” - I didn’t notice anyone actively using them.
- “Email” and “Exchange Services” - it seems like everyone is already on Gmail.
- “Google Search” is a rather useless function if you have a browser (beware, it also disables Google Now).
- “Google Keep”, “Google+” and other not always necessary applications from Google.
In addition, I recommend turning off (delete) widgets and live wallpapers. In addition to the fact that this functionality requires memory and CPU time, it also eats up the battery. So to increase speed it is better to turn off such things. You can also turn off effects on the lock screen. In my case (Samsung with stock firmware) they are located in “Settings -> Device -> Lock screen -> Unlock effect”.

Callouts: INFO
How disabling applications works. After clicking on the “Disable” button, the setApplicationEnabledSetting() method of the PackageManager class is called, which changes the application state to COMPONENT_ENABLED_STATE_DISABLED_USER (by the way, it appeared in the first Android).
Setting up power saving and using developer options
To speed up the operation of the gadget, you can also adjust the energy saving settings. Of course, this will reduce battery life, but it can speed it up quite significantly. To do this (in my case) you need to go to “Settings -> General -> Energy Saving” and either slide the switch located in the upper right corner or uncheck the necessary checkboxes.

This works differently on different platforms, and there is no public API - there is, of course, the PowerManager API, but this has only a very indirect relation to energy saving. However, on the Samsung Galaxy Note 10.1 (as well as for other Droid devices of the South Korean giant), energy saving is controlled through DVFS - Dynamic Voltage and Frequency Scaling, the same one with which Samsung “falsified” the benchmark results (I note in parentheses that this was not a real falsification - just for some benchmarks and applications the device worked at the limit of its capabilities).
To disable system animation (animation in applications will remain), you need to go to the developer options menu, which is hidden by default. To access it, tap seven times on the “Build number” item, which is located in the “About device / About phone” menu. Then go to the menu that appears and turn off all animation: set the parameters “Window animation scale”, “Transition animation scale” and “Transition duration scale” to “Animation disabled” (in firmware from other manufacturers, these options may have a slightly different name).
In the same menu you can limit the number of background processes. The latter, however, should be done with caution - instead of speeding up, it may slow down due to the fact that frequently used processes will be killed and started again. That’s why, by the way, all sorts of task killers are not recommended.

Application acceleration
To speed up individual applications, you can clear their cache. This is done in the same place where you can disable/delete them, that is, “Settings -> General -> Application Manager -> All”, select the application you need and click the “Clear cache” button.

It also makes sense to install less resource-intensive applications - for example, in my case, Smart Launcher takes up less memory than Samsung's native TouchWiz does. The sidebar will provide specific tips, but I don’t recommend following them specifically, since it all depends on your needs. The main thing in this case is to choose the right size/functionality ratio.
To determine memory consumption, you can use the following method: install some terminal with Busybox, determine the PID of the desired process (using 'ps w') and look at the /proc//status file. In this case, however, you need to take into account the Android architecture - the application can be distributed across several processes.
If this method is too difficult for you and you don’t want to bother with each application, there are several graphical analogues of the top utility in the market. I liked one of them, called Process Explorer, the implementation of which, however, seemed incomprehensible - why use a browser to view the list of processes?
By the way, the Google Play service has a habit of suddenly updating a bunch of applications, which, of course, eats up resources. It is not possible to disable this service, but you can disable the update itself. To do this, go to the Play Store, call up the menu (hint: if you can’t call it using the soft keys, “pull” from the left edge), select “Settings” and set “Auto-update applications” to “Never”.

Likewise, it makes sense to disable account synchronization (which, in addition to a possible increase in performance, will satisfy your paranoia). To do this, go to “Settings” and look for where the “Accounts” item is located, then select an account and disable synchronization (alternatively, you can disable only individual and unnecessary types of synchronization, such as, for example, Google+ contacts or calendar. - Editor's note).
Disable media scanning
By default, Android scans all external storage devices (SD cards) for media files. This function, although useful, slows down the system quite a lot. You can disable it. For new drives, create an empty .nomedia file in the root. But in order to disable the display of existing files in Android 4.0 and later, you need, in addition to creating this file in the folder you need, to clear the data and cache for the “Gallery” and “Multimedia Storage” applications and force them to stop. After the next launch, all multimedia files will be indexed taking into account the created .nomedia files.
I will give some tips on the most famous brands. It is worth noting that these tips are only suitable for official firmware, so if you have a modified firmware, you can safely skip this section.
Samsung
If you are the owner of any of the devices of this brand, you probably noticed that going to the main screen by pressing the Home button is a little slow. This is due to the fact that double clicking launches S Voice, a speech recognition system. If you do not use it, you can disable this function by unchecking the “Open. "Home" key. In addition, if you accidentally enabled the wake command, it is better to disable it - using this option affects the battery charge quite significantly.

Additionally, some Samsung devices have the option to disable launcher effects. To do this, long-tap on an empty space on the home screen, select “Home screen settings” and in the “Transition effect” submenu select “None”.
HTC
In some cases, the error reporting service may be slow on HTC devices. Although it is not recommended to touch such things, you can disable this option by going to “Settings -> About phone -> Send HTC” (Tell HTC) and unchecking the corresponding checkboxes there.
Sony
On Sony Xperia SP, there is a situation when the phone suddenly starts to slow down. You can try to fix the problem by uninstalling updates for Google Chrome: “Settings -> Applications -> Chrome -> Uninstall updates.”
Greenify
The Greenify application allows you to forcefully put to sleep unnecessary processes (which you can select) while the device is sleeping, and prevent them from being called from third-party processes. This differs from task killers, which do not in any way prevent background applications from restarting due to external events (by a timer, the request of another application, or a system event). Unfortunately, some functionality is only available on rooted phones - in particular, the most important function of sleeping applications a few minutes after the device falls asleep.
The reason is that the forceStopPackage() method, which allows Greenify to put applications into an inactive state, is internal and is only available to system applications or those running as root. In non-root mode, you can only use the killBackgroundProcesses() method, which does not completely unload the process from memory, so system events continue to come to it and “wake up” it, which does not at all correspond to the Greenify ideology.
Therefore, to implement functionality in non-root mode, the Greenify developer took a completely different and very inventive path. When installed, the application registers as an Accessibility Service, thus gaining access to the system interface, and then simply calls up the application manager and clicks on the necessary buttons to kill the application through the standard Android settings menu. During sleep mode, this operation is unfortunately not possible, so on non-rooted smartphones Greenify can only sleep applications after the user presses the corresponding button.
ART
In Android 4.4, a replacement for Dalvik appeared - ART, Android Runtime. It provides AOT compilation. In order to understand what it is and what the advantage of ART is, you will have to take a brief excursion into history.
At the time when the foundation for Android was being laid, Java was chosen as the programming language - largely due to the fact that the OS was supposed to be used on a wide variety of platforms. And it was good for everyone, except for one thing - the speed of Java applications was quite low. This happened because the code was actually being interpreted.
Time passed. In Android 2.2, JIT compilation was added to the Dalvik virtual machine. This allowed us to achieve a fairly significant increase in speed, but did not solve all the problems. And now in the KitKat version ART appeared, which allows you to compile applications not even at runtime - during installation. You can enable it in the same developer menu where we disabled the effects. This, on the one hand, increases installation time and size, and also, when turned on for the first time, it takes significant time to convert all already installed applications into native code. On the other hand, the increase in speed after enabling it is on average 50%, and for some applications even more (in particular, scrolling has become much smoother).
But ART also has disadvantages. Some of them are obvious - for example, incompatibility with certain obfuscators and applications. They simply don’t concentrate attention on certain individuals, although they should. Among these I will include possible security problems. Experiments conducted relatively recently (at the May HITB conference) show that if a specially generated DEX file is inserted, the translator (dex2oat) crashes. In addition, if you find vulnerabilities in ART itself, it will be possible to create user-mode rootkits. In addition, the boot.oat image generated by the translator has a fixed base address (0x700000), which allows you to bypass ASLR under certain conditions.
At the same time, from the point of view of reverse engineering, static analysis of OAT files is still difficult - for the reason that the usual method names are simply not in the code. This is understandable. However, since the OAT file format is actually ELF, you can use tools designed for the latter, such as GDB. As for the dynamic... There is no toolkit for it as such.
ART will be enabled by default in the fifth version of Google's OS (and Dalvik, accordingly, will be removed). In my opinion, given the potential security problems, it’s too early to completely abandon Dalvik, so I don’t agree with Google’s policy here. However (with this in mind), it is all the more worthwhile to enable ART on KitKat to test the applications you need.
Conclusion
Despite the flexibility of the Android platform, it is difficult to speed up your device without using custom and/or rooted firmware. But it is not impossible, as this article proves. Finally, I’ll give you universal advice: install only those applications that you will actually use, and say a firm “No” to everyone else.
Lightweight programs for Android
I will give a short list of lightweight analogues of the necessary programs for Android. This list is minimal, including only what, in my opinion, is necessary:
- You can use RMaps instead of Google Maps. Not only is this application lighter, it is also much more functional.
- Cumbersome Adobe Reader can be replaced by Mupdf.
- There are quite a lot of readers. Among the lightweight ones, I can recommend AlReader and FBReader.
- As for browsers, you can install Lighthing Browser, which is de facto a lightweight standard one.
- It is better to replace the extremely heavy Feedly RSS reader client with the lightweight FeedMe (be careful, only for smart people).
What does root give? (editor's word)
About a year ago, I wrote an article about speeding up new versions of Android on outdated devices. In it, I talked about several techniques that require root rights, with which you can increase the performance of your smartphone by unloading all non-critical system components from RAM. In short, the article presented five main methods:
- Tuning the Low Memory Killer mechanism in order to teach the system to unload background applications from the device’s memory faster than it does by default. The trick requires modification of kernel parameters and is therefore only available on a rooted device. Applications used: Auto Memory Manager or MinFree.
- Removing all unnecessary system applications from the /system/app and /system/priv-app directories. Can be done using any file manager with root support.
- Disable unnecessary system applications using Bloatware Freezer, disable their autoloading using Autostarts.
- Installing an optimized custom kernel and activating the Zram mechanism, as well as the TCP westwood congestion control algorithm. Overclocking the processor.
- Tuning the kernel virtual memory subsystem to ensure faster unloading of data from caches.
In this article, we will figure out what background applications are on Android, what they are for, and how to disable them.
What are background applications on Android
Background programs run background processes that are invisible to the device owner. The application seems to be closed, but it still consumes system resources, takes up space in RAM and reduces the device's battery life. Such processes start without your knowledge and run in the background - hence their name. There are generally good reasons for running these processes - it could be synchronization, retrieving location data, or other activity related to the purpose of the application.
But not all background processes are necessary. For example, we use some applications extremely rarely, and unnecessary background processes only unnecessarily load the device. The Android system has built-in tools with which you can always see what applications are running in the background, how much memory they consume and how they affect the battery charge.
To see which background processes are currently running, you need to:
- Enable in settings developer mode
- Select menu item " Process statistics»
- Select application
In the window that opens, you will see all the information on the selected background application.


You can also see which programs and how much they affect the battery consumption of your device. To do this, go to the battery settings and select the menu item " Battery usage" You will receive a list in which, in descending order, there are applications that negatively affect the battery level.


What background programs on Android can be disabled
The two main types of apps that you probably don't want running in the background are games when you're not playing them, and music players when you're not listening to music. Look at other background processes too. If you don’t need this application at the moment, then you can safely close the process.
The applications necessary for the operation of the device themselves will not allow you to close their background processes, this is how the Android system works. But do not close system background applications and those that you constantly use. If, for example, you close the processes of social networks and instant messengers, you will stop receiving notifications about new messages. Most applications and services whose names begin with “Google” should not be closed either. Here are the most important Google processes:
- Google Search
- Google Play services
- Google Contacts Sync
- Google Keyboard
- Google Play Store
You can either disable the background process or force close the app completely.
- To disable a background process, you need to go to the menu " Process statistics» select the required one and click « Stop»
- To forcefully stop the application, you need to go to the " Application Manager» select what you need and click « Stop»

Some applications themselves automatically launch in the background even after closing. To “put them to sleep” you can use Greenify. This utility prevents applications from starting automatically. If your device has ROOT rights, you can completely remove unnecessary applications from startup. You can read how to get ROOT rights in our other article.
What to do if you have disabled background programs on Android that you need?
If you accidentally disabled system processes or background processes you simply need, simply enable them again or reboot the device - the system itself will enable everything necessary for work.
Very often, Android smartphone manufacturers equip their firmware with a large amount of software that users will never need. At the same time, such software takes up a sufficient amount of memory on the internal storage and cannot be moved to the card. Moreover, all these programs “hang” in RAM and “eat up” a significant part of the RAM and CPU performance. Today we will talk about how to deal with this and teach you how to remove system applications on Android.
You need to carefully remove unnecessary applications (for example, maps, the launcher itself, music, cloud, Facebook, Google movies, YouTube, etc.). The fact is that some of them are necessary for the operation of the system and, if they are removed, its functionality will be impaired. For example, if we remove the standard browser and do not install a third-party one, then when we try to access the Internet, the OS will throw an error.
Moreover, if you delete, for example, the wireless connection service (and this can be done easily), Wi-Fi or Bluetooth will simply stop working and can only be restored by flashing the firmware. The list of necessary components can be continued for a long time.
Therefore, before you start uninstalling, be sure to make sure that the program is not needed for the OS to work and its absence will not harm it. Also pay attention to the prompts of the uninstallers themselves.
Methods for removing and disabling system software
So, let's get straight to working on the standard programs on your phone or tablet. This can be done in a variety of ways, both using third-party software (in most cases) and standard tools. You should know that all of these options, except one (does not remove all programs) require Root rights. You can get them in different ways depending on the firmware (Android 2, 3, 4, 5.1, 6.0, 7, 8) and smartphone model. The KingRoot program often helps.
Root permissions are administrative privileges in Android that allow you to modify the firmware files itself.
Disabling using standard means
This method is the simplest and works without Root rights. However, it also has disadvantages. The fact is that not all programs can be disabled. Let's look at how it works:
- Lower your device's notification bar and go to its settings. This is usually a gear icon.

- Scroll the contents of the window a little lower and find the settings item called “Applications”.

- Next, select the application you want to disable.

- If this program supports the shutdown function, you will see a corresponding button. Just press it.

- Next, select the item marked in the screenshot from the pop-up menu.

- Programs disabled in this way are not deleted: they simply stop until you run them yourself.

Attention! When you disable the standard software using the described method, the updates that were installed on it will be automatically deleted.
Program "Remove system applications"
Next we move on to using third-party software. The first application on our list will be “Uninstall system applications”. You can download it from the Play Market, which is what we will do now.
- Go to the Android application store and write the name of the program in the search bar. As soon as the desired result appears in the results, click on it.

- Install the program by tapping the button marked in the screenshot.

- We allow access to location, multimedia, Wi-Fi and other functions.

- The download of the program we need will begin. Since its size is small, it will not take much time.

- So, the download is complete, so let’s proceed directly to working with the application.

- At the first launch, we will need to provide the same Root rights that were mentioned in the introductory part of the article. Click the button marked in the screenshot.

- A list of all applications, including system ones, will open. We check the boxes that we want to delete and press the button marked “2”.

- We will be warned that we have identified applications that are important for the operation of the system. Think twice if you see such a message. In our case, everything is correct, so click “Yes”.

- The removal process will be completed in a matter of moments.

Ready. The program will disappear from your smartphone at the same moment.
Let's consider another option, which, if it differs in some way from the first, is only in appearance. We will also download the program from the Play Market.
- We begin to write the name of the utility in the search bar of the Google store and, as soon as our program appears in the search results, tap on it.

- Next, press the familiar green button.

- Allow Easy Uninstaller all required permissions.

- We are waiting for 5 MB to be downloaded from the network and installed on our Android.

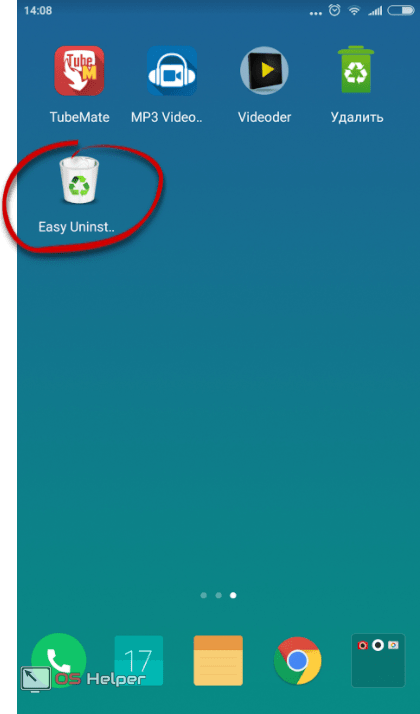
- We go to the home screen and see a new shortcut in the form of a trash can. This is exactly what we need.
- In the list of programs available for removal, mark one or more items and press the button marked “2”.

- Once again we confirm our intentions by clicking on “OK”.

That's all. The application or applications will silently disappear so that they no longer burden our phone.
CCleaner
Here's another interesting option. Surely, few of you knew that the well-known program for cleaning the disk and phone storage is capable of removing pre-installed applications. Nevertheless, it is true. Below we will show how it works.
- In the same way as in previous cases, we are looking for the application in the Play Market.

- We install it by pressing the familiar button.

- We are waiting for the download of all the files necessary for CCleaner to complete.

- Let's launch our cleaner. Today it will act as an uninstaller.

- So, when the program opens, go to its main menu. To do this, click the button with the image of three horizontal stripes (marked in the screenshot below).

- In the menu that slides out from the left side, click on the “Application Manager” item.

- A list of installed and system software will open. To begin the removal procedure, click on the icon with the image of a trash can.

- And again we are warned that if we thoughtlessly “demolish” the standard software, we can easily “kill” our operating system, which, unlike a computer, is not so easy to repair. If you understand this, you can continue. Click the button circled in the picture.

- Mark the programs or games that need to be uninstalled and tap on the “Delete” button (marked with the number “2”).

After this, the program, game or their combination will be removed from Android.
Via file manager
This option for removing unnecessary applications from Android differs from the above. Here we will do everything ourselves, while the previously described uninstaller programs worked in automatic mode. So let's get started.
- We will use one of the best file managers. This is ES Explorer. Let's download it using Google Play.

- Click the button labeled “Install”.

- We allow the application all types of access that it needs to function properly.

- The program is downloading. Since it “weighs” a little more than 10 MB, it will not take up much of your time.

The application is installed and ready to use. Next, we will look at how to remove standard programs. Launch the tool.

- Open the main menu of ES Explorer. We have marked it in the picture below.

- Now we need to allow our file manager to work with operating system components. To do this, enable the “Root Explorer” function using the trigger marked in the screenshot.

- Naturally, in this case we will need to provide the program with Root rights.

- When access to the firmware files is allowed, return to the main ES Explorer screen and go to the menu.

- Next, we need to go to the “Device” directory. This is our file system, and not the file system of the drive, but the system disk or firmware.

- So, to uninstall the same application, you need to erase files from several places. Let's visit the first one first. Go to the “system” directory.

- Then open the “app” folder.

- In Android 5 and above, you will see application folders. They contain APK files. In earlier versions of the operating system they will be located here without directories. One way or another, we need to delete the selected application with or without a folder. To do this, click on the object and hold it until the button marked “2” appears.

We confirm our action by tapping “OK”.

So, we have cleared the first path, let's move on to the second.
- We return to the root directory of the firmware and go to “data”.

- Then we open the “app” directory and “remove” all traces of the unnecessary program.

- Go to “data” again.

- We go to the directory marked in the picture below and delete the data of the unnecessary program from here.

That's all. The method is one of the most complex and dangerous for the OS. We recommend using it only for people who are well versed in the topic.
We are gradually moving on to another option for removing pre-installed Android applications. This time it will be another utility called Root Uninstaller. Let's look at how to work with it.
- In the old fashioned way, go to the Play Store and enter the name of the tool in the search bar. When the desired object appears in the search results, tap on its icon.

- Click the button marked in the screenshot.

- We wait for the installation of all the necessary files to complete.

- Go to the home screen or menu and select the application you just downloaded.

- As in other cases, we will need to provide access to the operating system files. Otherwise, nothing will work.

- When the program opens, we will see a list of all third-party and standard applications, as well as, if any, games. Tap on the one that needs to be removed.

- An additional menu will open with several options.
Identification of the various buttons:
- Freezing. The application or game is blocked: it does not occupy RAM and does not load the processor. However, the occupied disk space is not freed and the program is not removed;
- Delete. The application is completely removed from Android;
- Backup. A backup copy is created, which in case of failures will help correct the situation and restore what you deleted;
- Reset. The software is cleared of all updates and data received during operation.
There are also a number of additional functions that are not particularly important to us.

- As soon as we click the delete button, a warning will follow in which we will need to confirm the action taken. In order to do this, click “OK”.

Attention! To ensure data safety and guarantee stable system operation, be sure to use backup tools before deleting each program!
From the name of this program it is clear that it requires superuser privileges to operate, although they are required for our entire list. So, let's look at how to work with Root App Deleter in more detail.
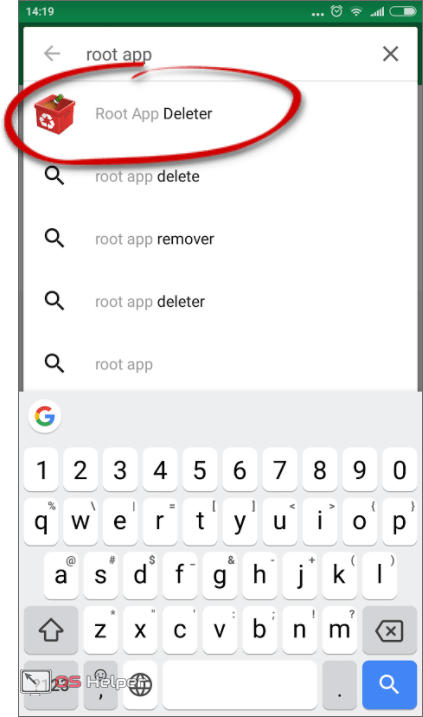
- The first thing we will need to do is download the application to our phone. To do this, we will use the Google Play store. Enter the name of the program in the search field and select the desired result from the results.
- On the Root App Deleter home page, click the familiar button labeled “Install”.

- The program “weighs” only 700 kilobytes. This is very little, especially compared to competitors.

- So, the list of uninstallers has been replenished with a red icon, click on it.

- There are several tiles in the main menu of our application. We will work with the uninstaller. Click on the item marked in the screenshot.

- Next, we will be asked to select one of the program removal modes. This could be a newbie that automatically creates a backup copy of the existing software before uninstalling it. There is also an expert mode in which programs are deleted immediately and irrevocably. Choose the algorithm that suits you.

- As a result, a list of programs available for removal will appear. We will uninstall the most unnecessary of them. At least in our opinion. Click on the application name.

- Since this is beginner mode, there is no delete button, but there is a disable button. This way we can test the operation of the system and, if everything is fine, we will remove the software completely in expert mode.

- As in other cases, you cannot do without Root rights. Tap on “Provide”.

Ready. The program is disabled and no longer consumes phone resources.
Titanium Backup
Next up is the famous backup app. Among other things, the tool can remove any software, and if SuperUser is present, even system software. So let's figure out how to work with it.
- So, go to Google Play and look for Titanium Backup there. The main thing is to find the Root version. Otherwise, nothing will work. See screenshot attached below.

- Then, as in other cases, press the button indicated in the screenshot.

- We are waiting for the download of the small file to finish.

- And we launch our Titanium Backup by tapping on its icon on the home screen.

- When starting, the program will request access to the firmware files - we provide it.

- And here a small obstacle awaits us. The fact is that for Titanium Backup to work properly, you need to enable USB debugging on your phone. Don't be alarmed - there is nothing complicated about it. Initially, click “OK”.

- Next, let's move on to the settings of our device.

- Scroll to the bottom of the list and select “About phone”.

- Next, you need to quickly start tapping on the “Build number” item. In our case, there is a non-standard add-on to Android - MIUI, so here we click on its version.

After this, an additional item called “For Developers” will appear in your settings.

We just need to switch the trigger marked in the screenshot to the active position.

Now you can continue the instructions for removing useless system applications from Android through Titanium Backup.
- Go to the “Backups” tab and click on the program that we want to “demolish”.

- Here we see several points of working with the software. Below is their designation.

- After clicking the delete button, we will be warned one last time that we have not backed up the program and that if we delete the system software, the operating system may crash. Despite everything we click “YES”, we still advise you to create a backup.

A little earlier, we removed standard applications from the system using the same program. However, now we will use another tool, which is also included in the functionality of ES Explorer. It works like this:
- Launch ES Explorer from the icon on the desktop or in the application menu.

- On the main screen, tap on the marked icon.

- Select the application that you want to remove.

- Click the “Uninstall” button.

Root rights are not required in this case, since the system remembered ES Explorer after the first grant of permissions.
- The uninstallation will begin, which looks exactly the same as a standard Android uninstall.

That's all - the program or game has been deleted.
There is also an option to remove built-in applications using a PC through the Debloater program, but it does not always work and is quite complicated. It is better to use one of the methods described above.
Results and comments
So, now the question of how to remove factory applications on Android is completely revealed to you. We have provided a lot of methods, one of which will definitely work. It is important to perform a backup before any action so that you can restore the data later if necessary. You can also disable the software rather than uninstall it in order to check the functionality of the system without it.
One way or another, if something doesn’t work out and you still have questions, describe the situation in the comments, and we will certainly try to help.
Video
Also, for greater clarity and completeness of the picture, we suggest watching a training video on this topic.
Android comes pre-installed with a lot of different apps that you may not need at all - they just take up space and use up the device's RAM. Any of them can be removed, and how to do this is described in this manual.
First of all, you need to get root rights on your smartphone or tablet. They make it possible not only to remove standard applications, but also to easily launch specialized applications that significantly expand the capabilities of the device.
For each device, the method for obtaining Superuser rights varies, but the most universal utilities are: and also.
Then you need to install a file manager that supports access to system directories and editing system files. For example, ES Explorer, File Manager from Cheetah Mobile or . In this tutorial I will use ES Explorer.
How to remove default applications in Android. Method 1
1. First, you need to grant editing rights to the root directory to the file manager. How to do this for ES Explorer is described in.
2. In the internal memory, go to the folder "/system/app".
3. Select the .apk file of the desired application and click “Delete” in the context menu that appears.

4. In addition, you need to delete the .odex file with the same name, if it exists.
In Android 5.0 and higher along the way "/system/app" All built-in system applications are located in separate folders, so you need to select them and erase them.

5. Many system applications in the folder "/data/app" updates are stored, from where they will also have to be deleted.

Again in Android 5.0, updates to pre-installed applications are on the way "/data/app" in separate folders. Select unnecessary ones and delete them.

6. Now all that remains is to erase the caches and databases of built-in system applications and services that are located in the folder "/data/data".

Uninstall pre-installed apps like Gmail, Google Drive or Maps. It is better not to touch system applications with the Android icon (for example, CertInstaller.apk or PackageInstaller.apk), since problems with the system may arise.
Uninstalling Android system applications using Root Uninstaller
Standard applications on Android can be uninstalled using the Root Uninstaller application. Download the .apk from our website and install.
1. After installation, open it and grant Superuser access.
2. Select the application you want to get rid of.

3. Click "Delete". Before deleting, you can make a backup.

In addition, applications can not be deleted, but frozen. This will stop them working and disappear from the menu, but will not be completely removed.
How to remove standard applications through ES Explorer
Some file managers have a special option for working with program files. Let's look at this function using ES Explorer as an example:
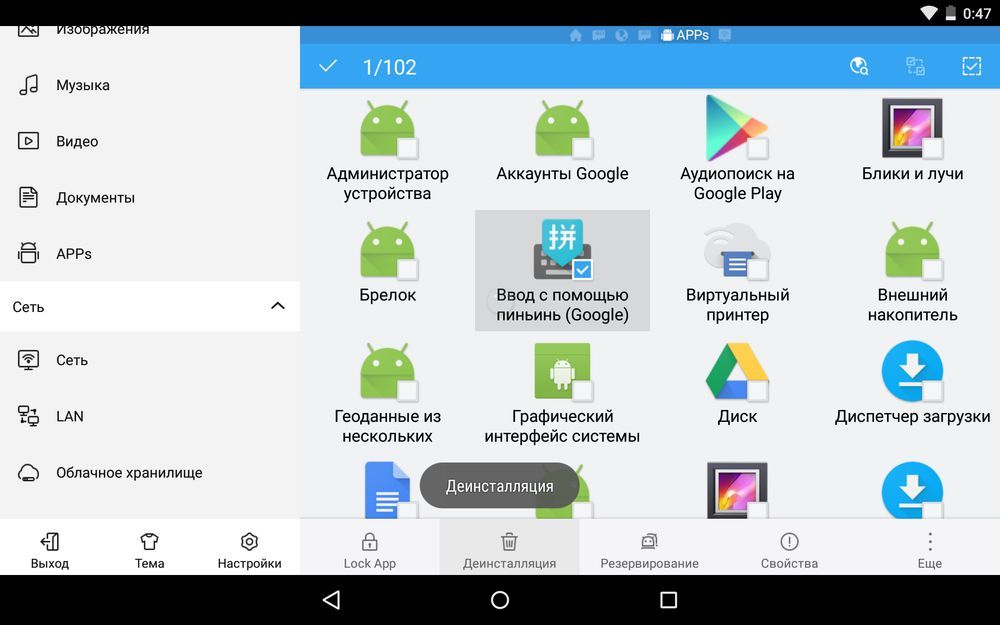
1. In the sidebar, under Libraries, select APPs.

2. At the top, click on “Custom”, thereby expanding the hidden menu. Select the “System” item in it.

3. Select programs that are no longer needed. From the list of options, select Uninstall.
I think that the methods I have proposed will be enough to remove standard Android applications. Yes, there are analogues of Root Uninstaller and other file managers that have the function of quickly removing built-in applications. But the 3 methods I talked about are the most convenient.
OS

